|
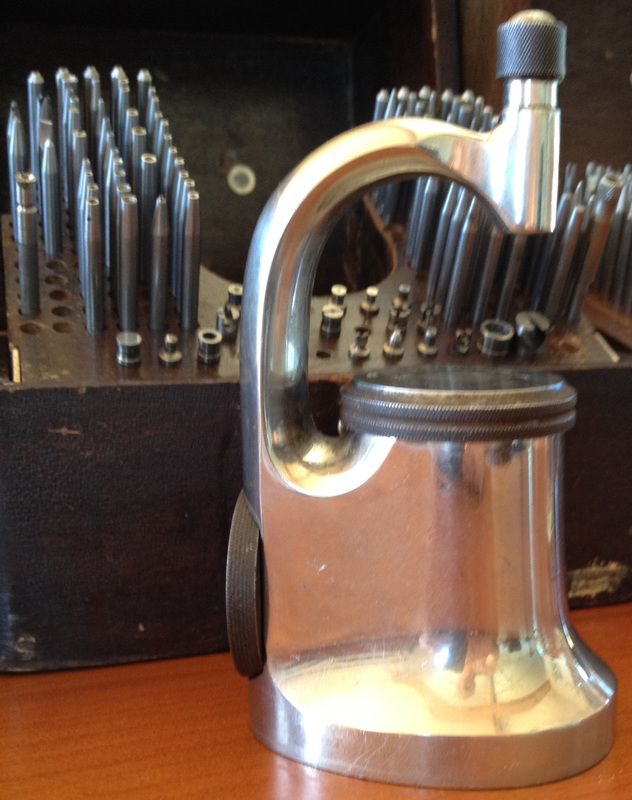
Kendrick and Davis (K&D) Inverto 18 Staking Tool
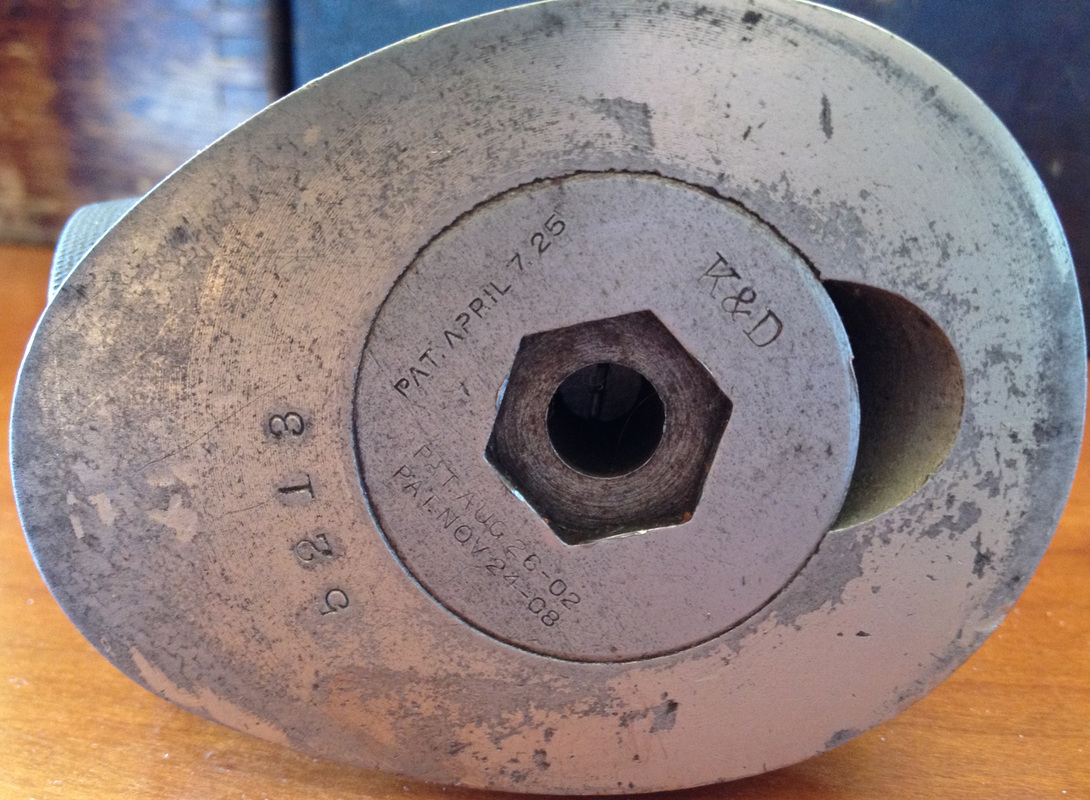
Frame s/n 5213 Frame manufactured after 1924
|
|
|
I have a staking tool acquisition problem. The first symptoms occurred about a year ago when I won an auction for one on eBay. Since then, there have been three more outbreaks, also from eBay auctions.
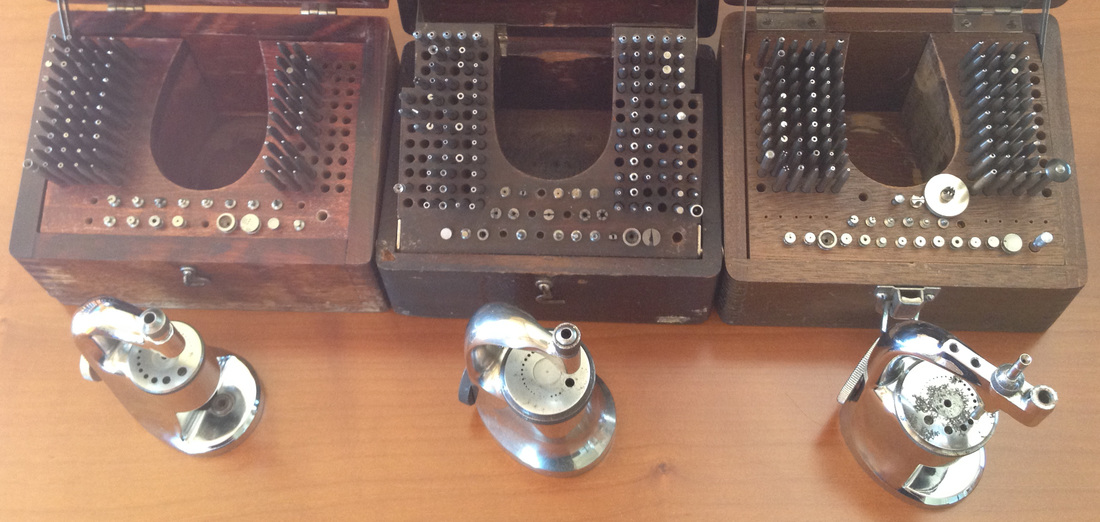
From left to right: Inverto 601, Inverto 18, and Inverto 18B. Stay tuned for the Inverto 18R Deluxe. |

ad in "Jeweler's Circular", Sep 3, 1919, page 232
|
For those that don't know what staking tools are, have a look at my site describing the history and evolution of the Inverto staking tool.
Image at left from a Google scan of a book titled "The Jeweler's Circular" for 1919 |
Ouch! |
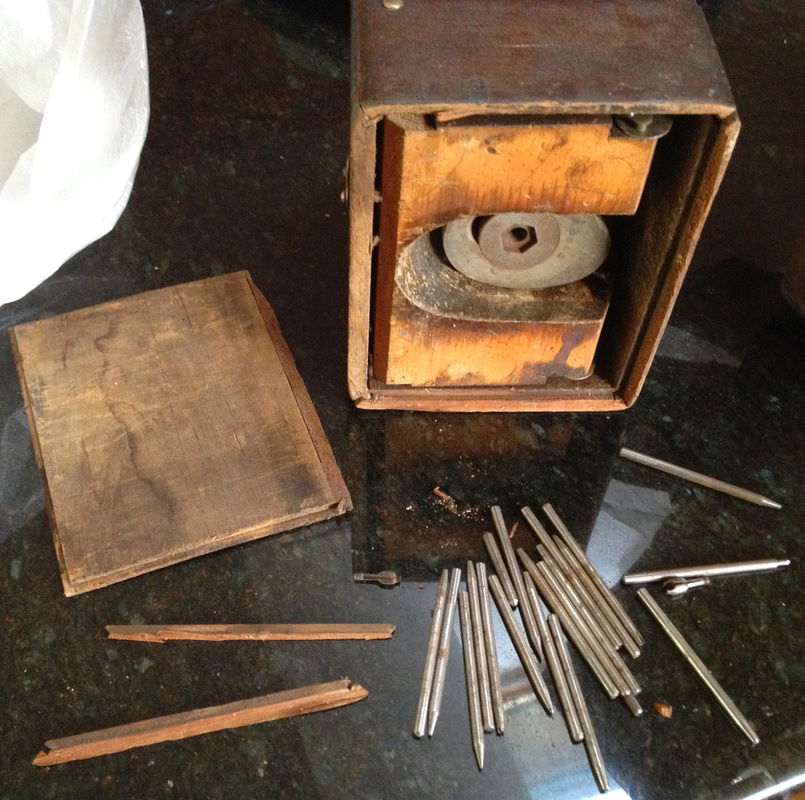
My Inverto 18 set was a real mess when I received it. The seller either didn't know how or couldn't be bothered to safely pack and ship an item that included a heavy steel base. By time I received it from the USPS, the shipping carton didn't have a single flat side. It was just a mashed up lump of cardboard and packing tape.
The contents of the shipping carton were broken and rattling around inside. The frame had not been packed tightly in the box and it had slammed around enough to split the side and break the bottom out of the nice wooden box. I was fortunate that the shipping carton didn't actually split open because of the liberal use of packing tape on the outside. If it had split open, most of the stakes and stumps would have been lost. I was also fortunate that eBay helped me resolve the poor packaging issue with the seller. |
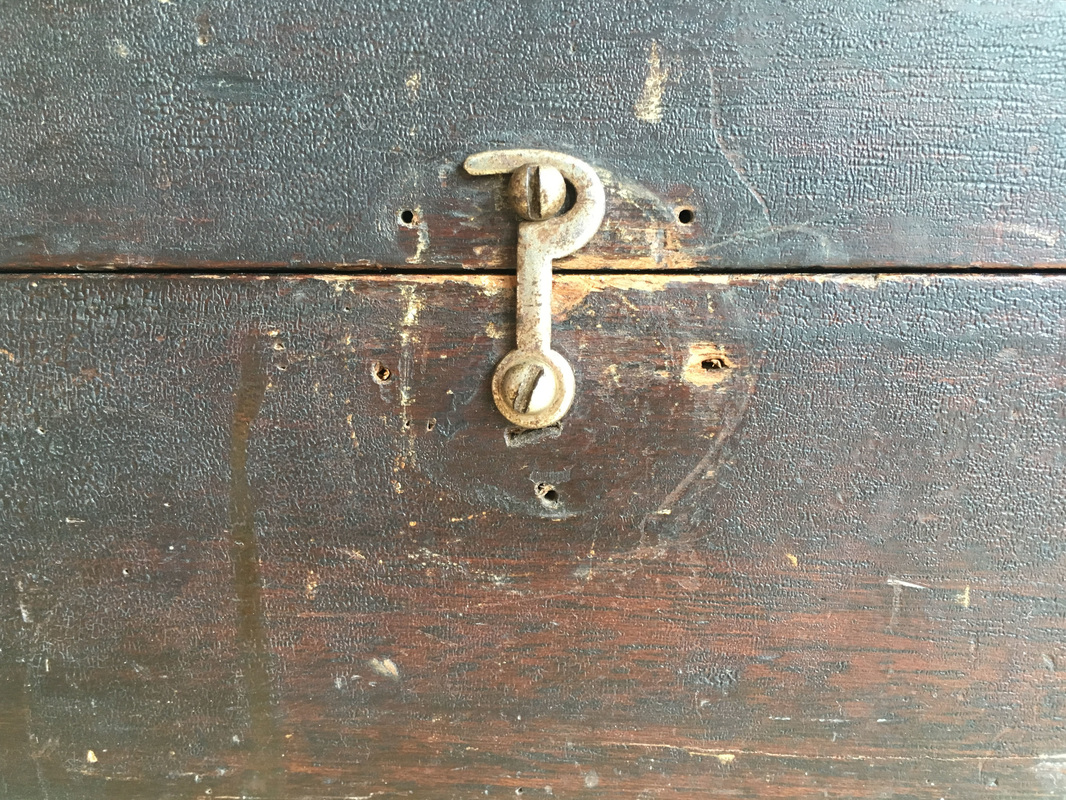
hack job replacement hook 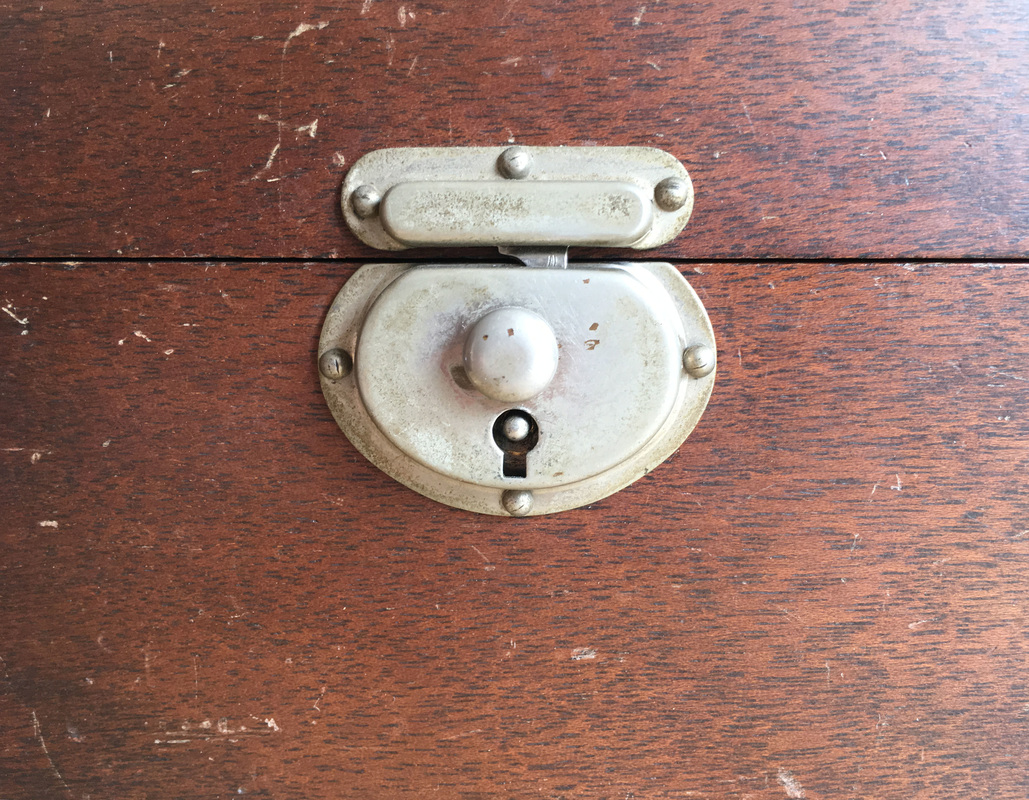
proper latch from another tool |
After resolving the shipping debacle, I went to work bringing the Inverto 18 back to life.
First order of business was to glue the box back together. There was only one small piece completely missing, so after a little gluing & clamping, the box was back up to snuff. I scrubbed the surface grime off with a rough cloth and some Murphy's Oil Soap. The box came out a little cleaner but it still has a lot of miles on it. Note the crudely replace latch. I found a period replacement at Dashto.com and will install it soon. |

image from amazon.com
|
|
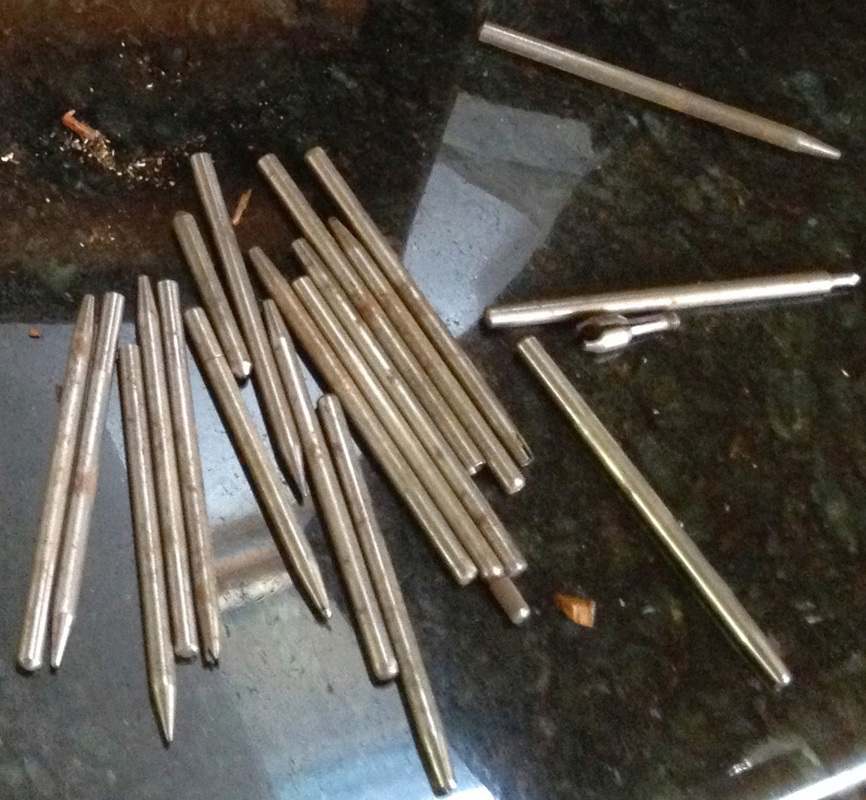
Next it was time to clean up the stakes and stumps themselves.
There was a lot of rust to deal with. Some surface rust/staining and some pitting. Most of the rust was on the shanks of the stakes and stumps, rather than the working ends, so I could attack it without fear of screwing up the function of the tools. |
before clean up stains, surface rust & a bit of pitting 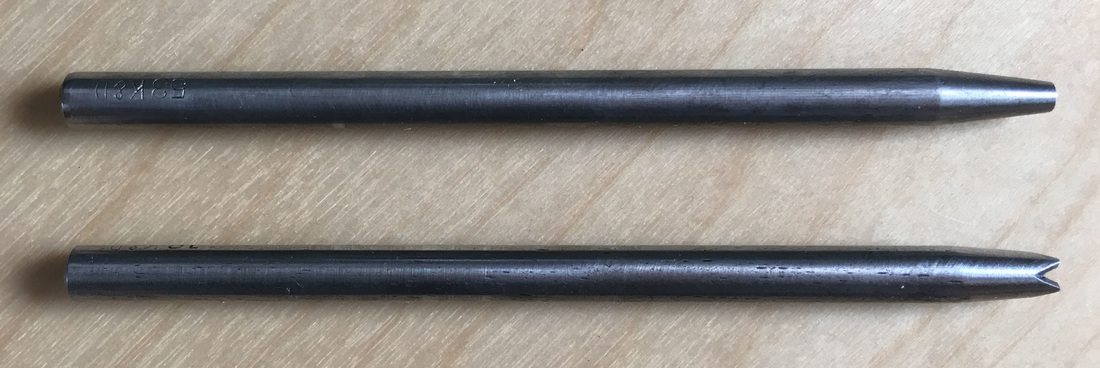
after clean up
oooooh...shiny! |
Stakes that have seen a lot of use are typically polished on their working ends and the first half inch or so of the opposite end. The middle of the shanks have striations along their length from being inserted into the head of the frame.
My stakes were in such rough shape that I was forced to polish off these striations in order to remove the rust. I polished them all using 220 grit and 400 grit 3M Wet or Dry sandpaper and light gray 3M Scotchbrite. During polishing, I kept the abrasives wet with WD40. I also made sure each piece was protected with WD40 when I was finished. I didn't want them to flash rust after all the work that went into cleaning them up. |
images from amazon.com
|

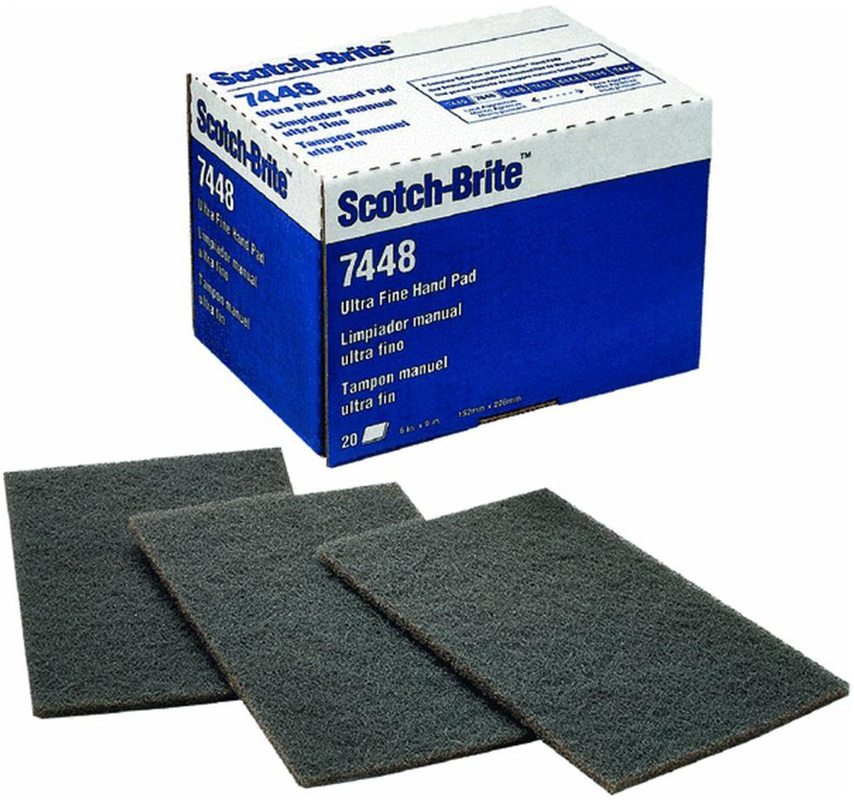

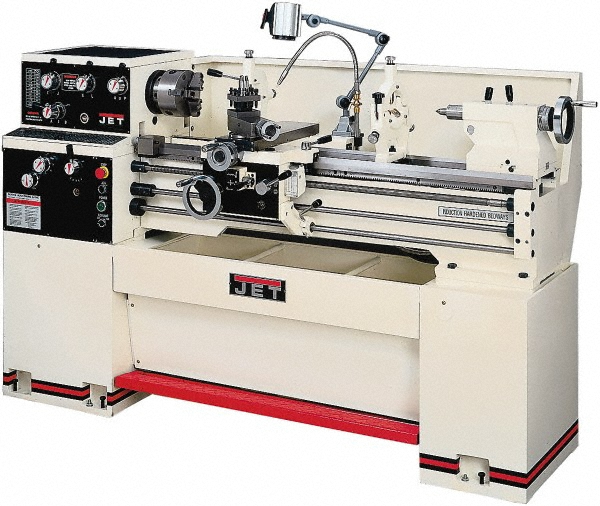
image from mscdirect.com
|
To make the polishing as easy as possible, I used one of TechShop San Jose's Jet 14x40 metalworking lathes. I chucked each stake lightly into the three jaw chuck, turned the spindle on low speed, and carefully sanded and polished away the ravages of neglect.
With something like 100 punches to do, even though it was easy, it took awhile. It was easier than I expected to work with my hands quite close to the spinning chuck and not injure myself. That said, I stayed focused on the job and I was paying close attention to not getting my fingers tangled up in the chuck jaws. By keeping the abrasives wet with WD40 and putting a shop towel down across the ways, I kept any grit off of the critical surfaces of the lathe. Any work on a metalworking lathe can be dangerous. If you don't know how to work safely around dangerous tools, don't work with them at all. |
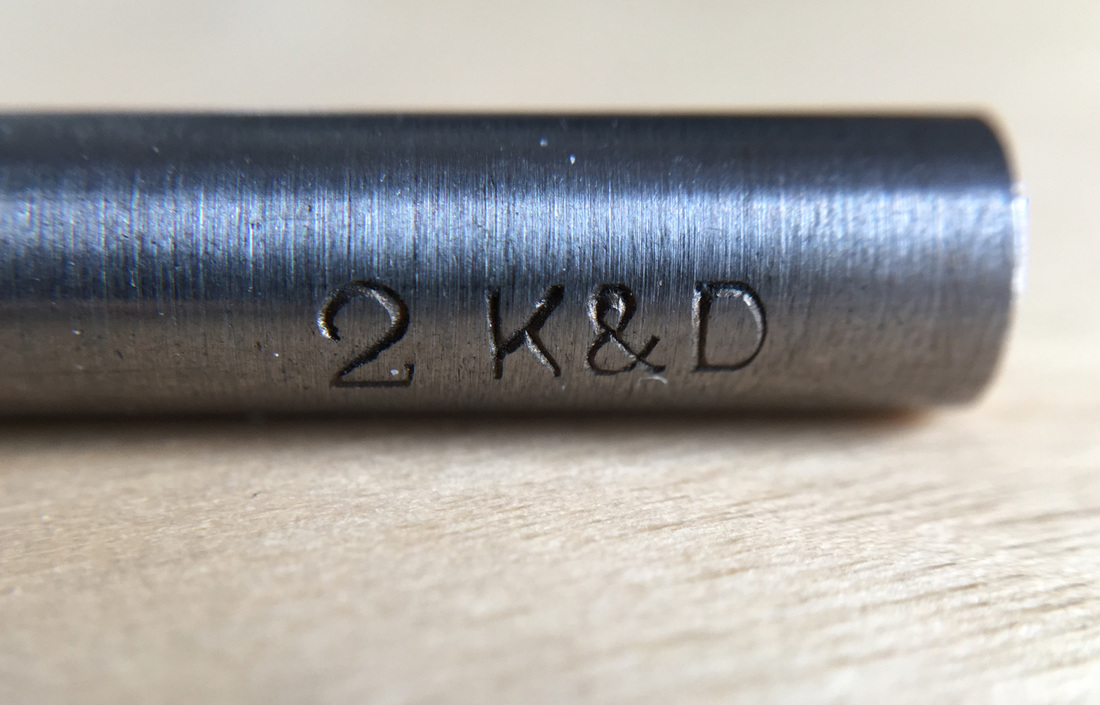
An easy to read example of a stake marking. Too bad the stumps aren't numbered... |
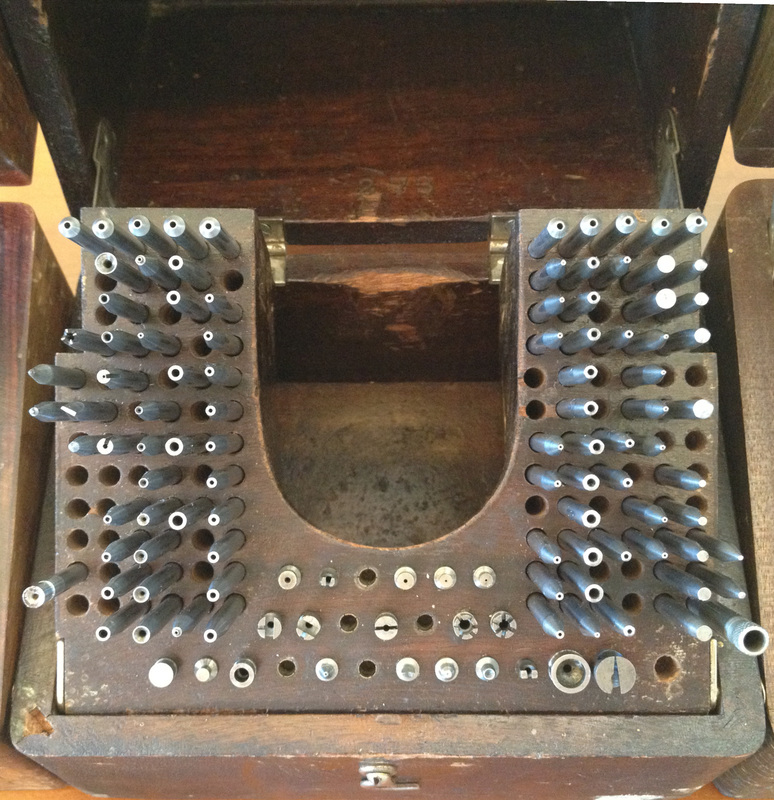
The next step after cleaning up all the tools was to identify them and see what was missing from the original set and what was extra or unidentified.
If you read Tom Adelstein's post on his excellent horology site, you'll understand that this wasn't quite as straightforward as one might expect. Differing number series, the same stake made with different numbers, letters as prefixes and suffixes, and, best of all, the stumps not being marked in any way made it a bit of a challenge. At least most of the stakes had some sort of a number. Parts from other manufacturers mixed in made identification even more fun. In the end, I figured that I had 95 of the original 120 stakes, 20 of the original 25 stumps, quite a few non-native stakes, and a few mystery stumps or stump-like objects. |
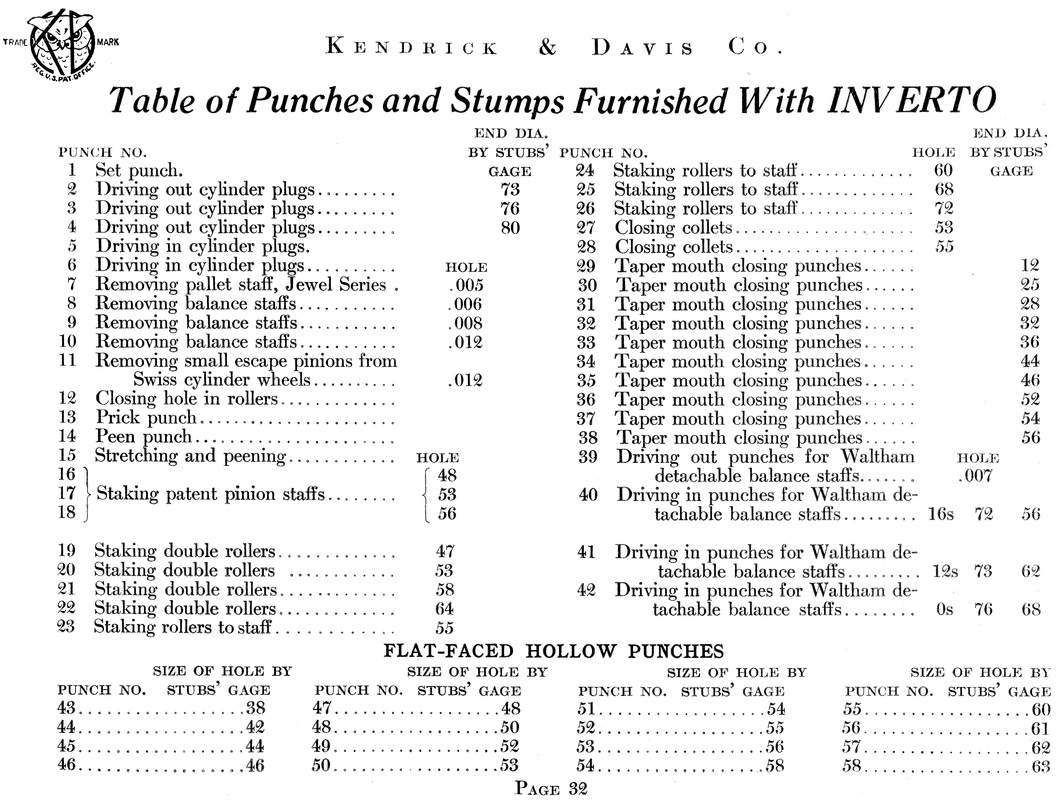
page 32 of "Staking Tools and How To Use Them" |
"Staking Tools and How To Use Them" offered a great place to start the identification process. The stake and stump inventory originally included in the Inverto/Inverto 17 and early Inverto 18 sets is laid out in detail on pages 32 & 33.
"Originally included" is the operative term here. Because many staking sets are most of a century old, few found today are complete and in their original configuration. This set is after 1924, so the stakes and stumps might be a little different but this is the best information I've found so far. |
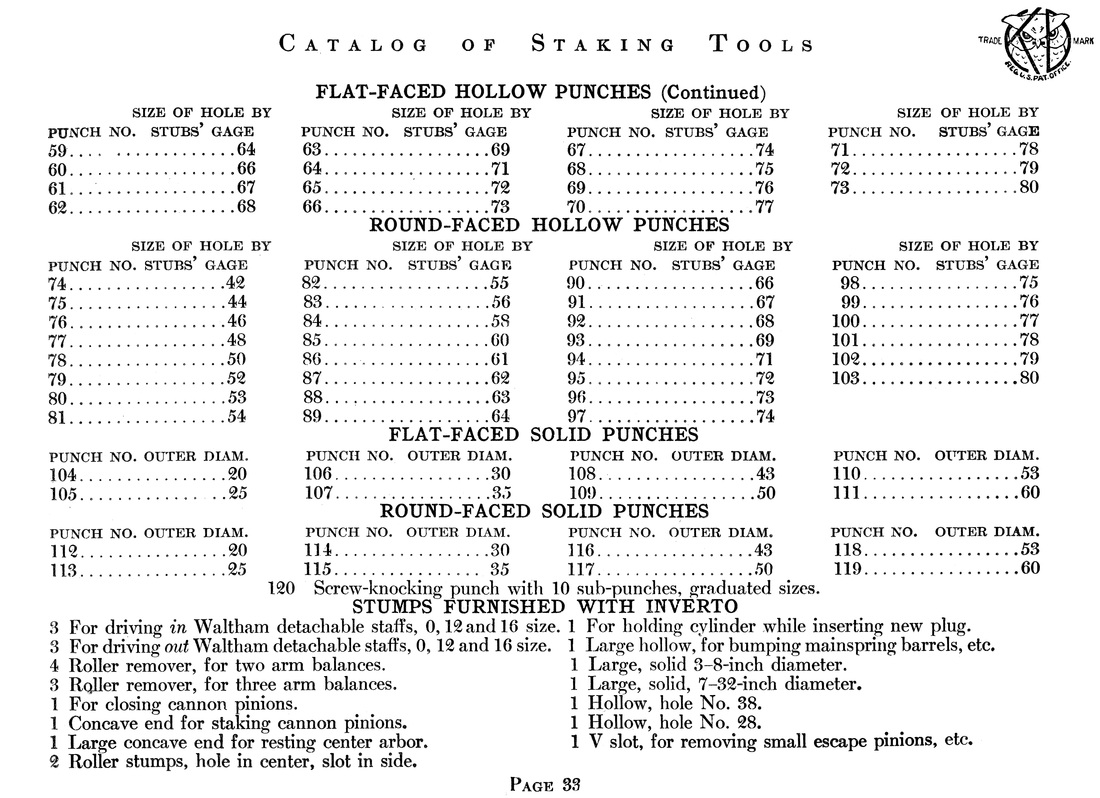
page 33 of "Staking Tools and How To Use Them" |
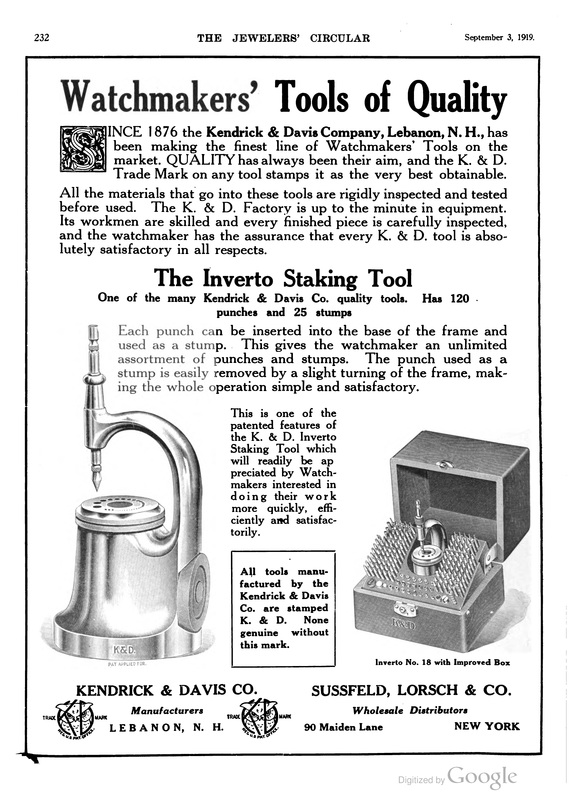
The Jeweler's Circular
Sept 3, 1919 page 232 |
The information in the 1910 K&D book was useful in helping me get started organizing the staking set. The hardest thing to figure out was the stumps since they were not marked. I only had the description to go on. It would be helpful to have some pictures to help me understand what was what.
Google to the rescue... After a bunch of searching, I turned up a Google scan of a book titled "The Jeweler's Circular" for 1919. It's a bound copy of a trade magazine. In the Sept 3, 1919 issue, page 232 is a full page ad for the Inverto. The cut on the left side of the ad shows a frame apparently identical to the Inverto/Inverto 17 shown nine years earlier in "Staking Tools and How To Use Them". The cut for the complete tool on the right is titled "Inverto 18 with Improved Box". The improvement includes the auto-tilting tool block like my set has. It also clearly shows a frame with the later punch frictioning assembly design. |
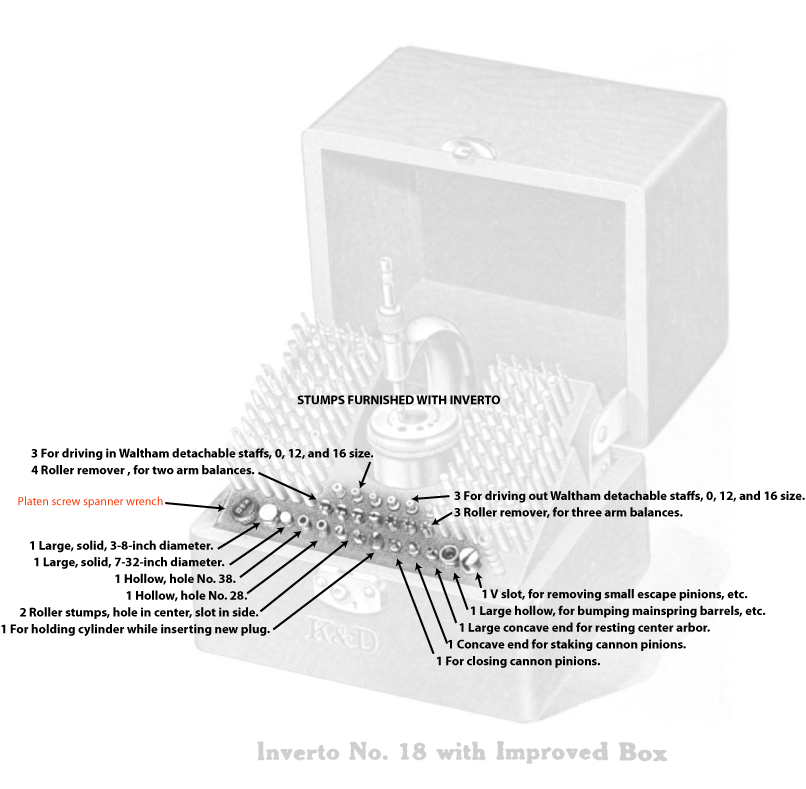
detail of page 232
|
The Google scan is reasonably high resolution, so it was possible to zoom in on the cut and see the actual layout of the stumps in the box...and it appears to match the list on page 33 of "Staking Tools and How To Use Them" exactly. See the annotated image above, right for a layout of the stumps.
interesting detail about the picture in the Jeweler's Circular ad. The Inverto 18 set shown contains a small knurled pin spanner for removing the retaining screw in the center of the die plate. It's not visible in the ad, but the screw in the center of the plate has two small holes to match the studs in a pin spanner. My set doesn't have the same screw and didn't come with the spanner. There isn't even a hole in the box for one.
Presumably, my press is a later version of Inverto 18 with a slightly different frame construction. That would indicate that the design changed sometime after 1919. The 1925 patent date stamped on the bottom of the frame likely indicates that this frame has the improved "floating die plate" described in US patent 1539890.

photo courtesy of Uncle Larry's Watch Shop |
One of the unique aspects of the early Inverto models was the inclusion of a set of ten screw knocking punches that look like short stakes. These are hardened steel punches designed to force a broken steel screw out of a brass watch plate/part.
The punches fit in to the top row of the box, where the holes are drilled less deeply than the others to accommodate the shorter punches. The punches in my set are all broken, but Larry of Uncle Larry's Watch Shop was kind enough to provide many useful pictures of an Inverto 17 set from his inventory. One of the photos was a detail of a sub-punch from the set. One end of each punch has a XXXmm diameter center hole about XXXmm deep. The other end has a smaller diameter shaft which was integral to the sub-punch body. This end is the actual screw knocking punch. The punch in the picture seems to have seen some use...the tip looks slightly mushroomed. |

page 7 from The Allen Monthly Feb., 1923 |
The description of the Inverto from a 1923 advertisement gives some ideas about the sub-punch design:
"...it also includes something entirely new in the punches for knocking out broken screws, etc. These punches are most frequently broken, for the strain put on them is often very severe. The new punch is so made that the part which gets broken is interchangeable. These pieces (sub-punches) may be instantly changed without tools. There is furnished with each holder 10 sub-punches, graduated sizes. These sub-punches are comparatively small, easily made, and of small cost if one wishes to buy them. This punch alone is a great addition to any staking tool equipment." Replacing these smaller sub-punches when they were broken was less expensive than replacing a full-sized stake, but this design did last long. |
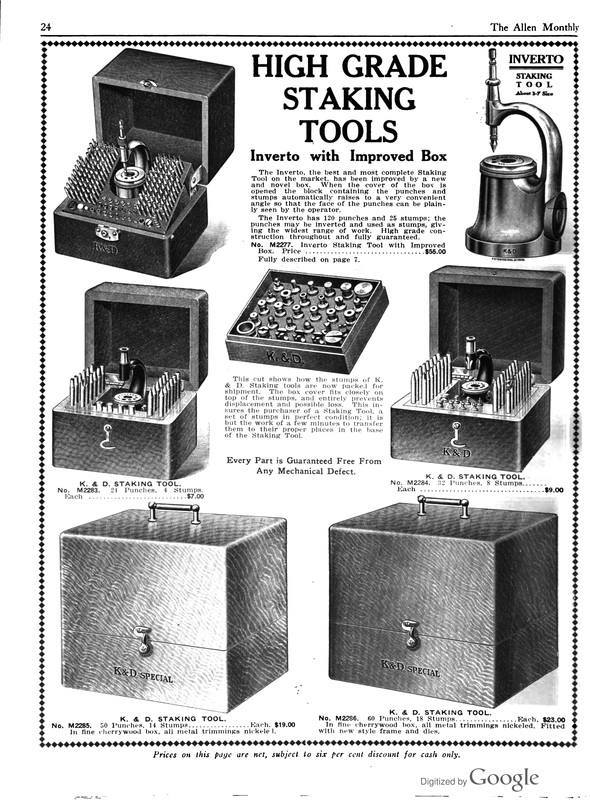
page 24 from The Allen Monthly Feb., 1923 |

K&D No. 316 |
The high cost of the original screw knocking punch design likely explains why this type of sub-punch was later replaced with the No. 316 set of 10 screw knocking punches and No. 120 holder.
The ten punches range from 0.005" - 0.050" by 0.005" increments. Presumably, the individual punches were available separately if broken. These sets appear from time to time on eBay. Image at left courtesy of eBay seller christies_watches. |
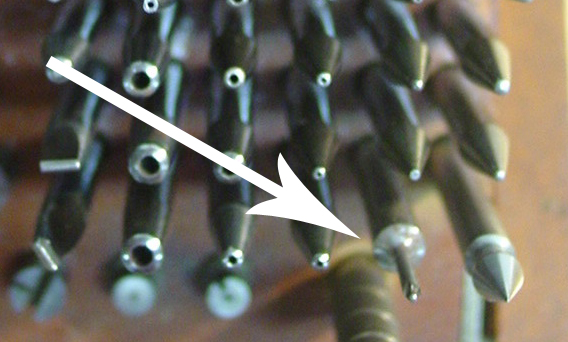
image courtesy of Uncle Larry's Watch Shop |
I've never been able to find a definitive picture or description of the holder for the old style screw knocking punches. On page 33 of "Staking Tools and How To Use Them" (see above), the holder is referred to as No. 120, which is the same number as the modern version of the screw knocking punch holder. Seems unlikely that the exact same holder design was used for such different punch designs even if the number is the same.
The original No. 120 stake was likely one with a short cylindrical shaft on the end that matched the holes in the sub-punches. See the image at left from Uncle Larry's Inverto 17 set. The stake indicated with the arrow is missing from my set and is probably the sub-punch holder. I plan to fix the original sub-punches and make a replacement for the missing No. 120 stake. For the sub-punches, I'll face off the ends with the broken stubs, drill out new holes, and press/loctite in the appropriate sized hardened wire tip in the 0.005" - 0.050" by 0.005" series. The end result won't quite be original, but it will at least be in the spirit of the original. I'll make the replacement No. 120 stake from some other broken stake. No shortage of those kicking around these days. |
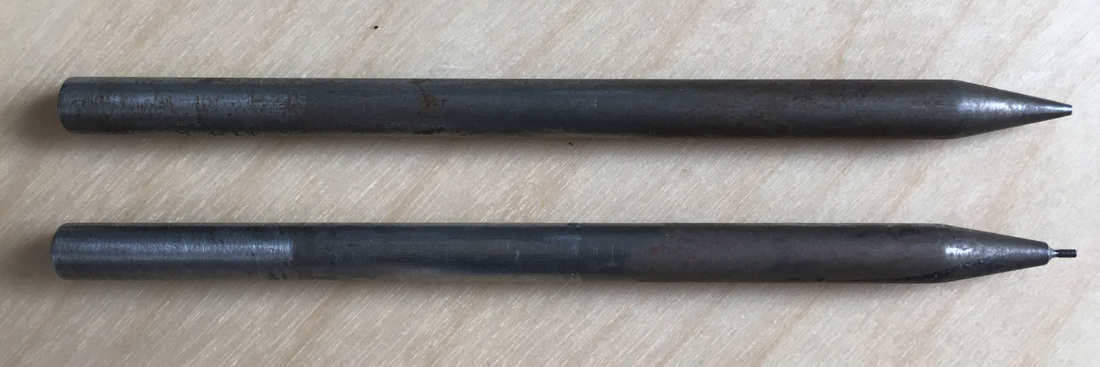
Although not unique to the Inverto 17 or Inverto 18, the early sets included a set of five cylinder plug stakes. See the pictures below.
These stakes were eliminated in later sets, presumably as cylinder escapements became less common.
My set was missing all of the cylinder plug stakes (Nos. 2, 3, 4, 5, and 6), perhaps because it's a later set. I eventually found the No. 2 shown here as the odd man out in a different set.
These stakes were eliminated in later sets, presumably as cylinder escapements became less common.
My set was missing all of the cylinder plug stakes (Nos. 2, 3, 4, 5, and 6), perhaps because it's a later set. I eventually found the No. 2 shown here as the odd man out in a different set.
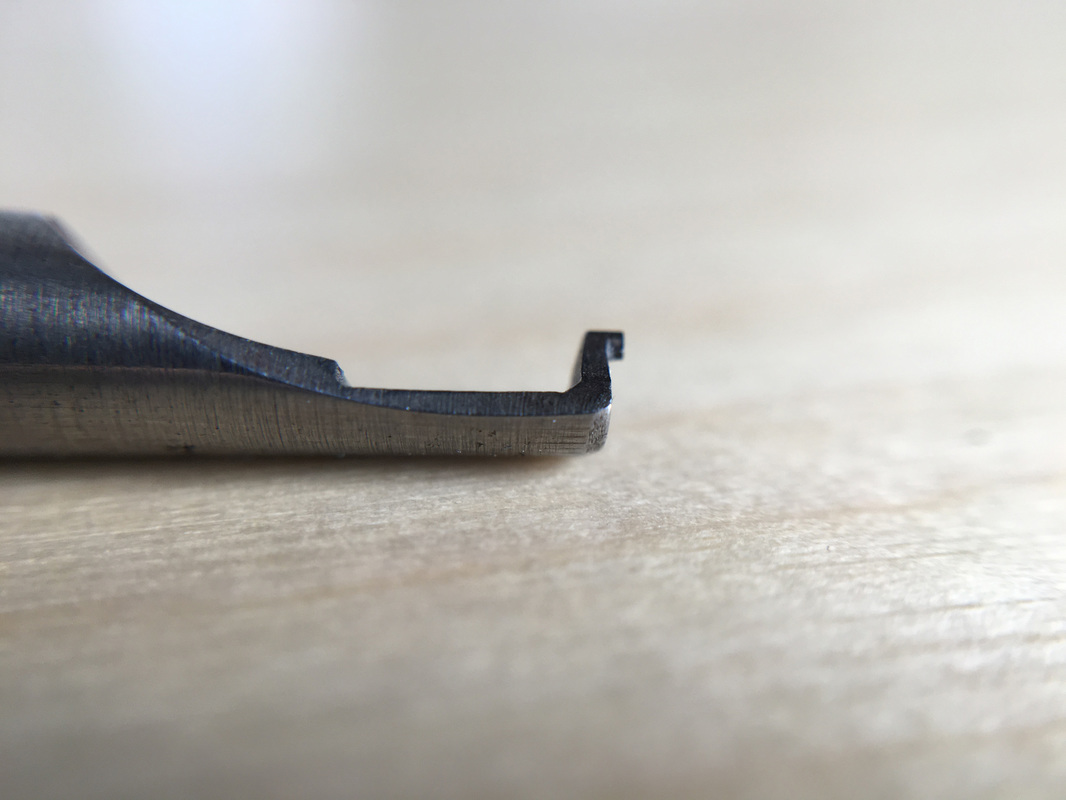
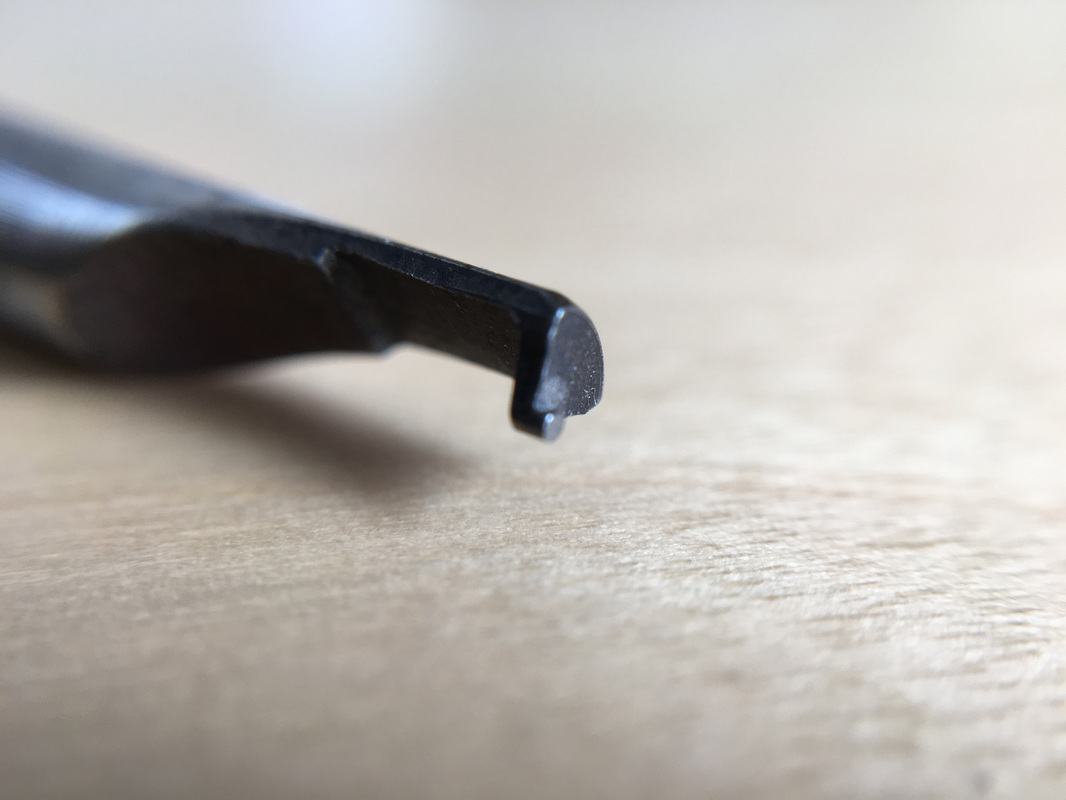
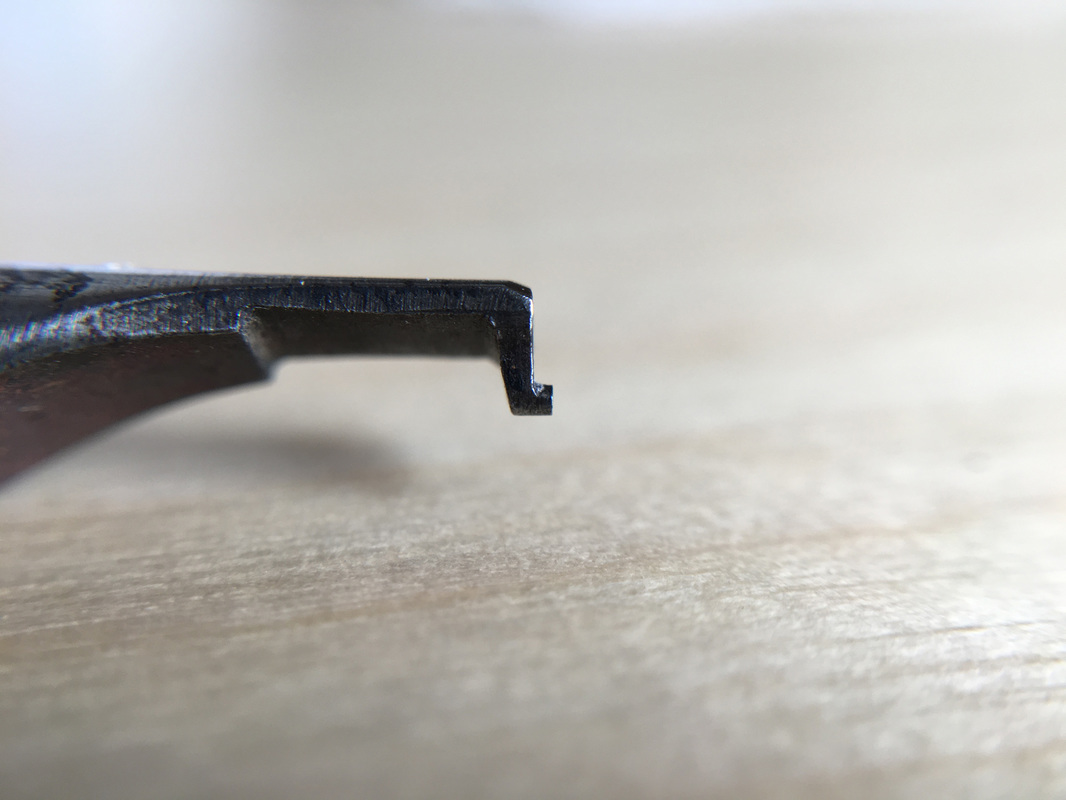
close ups of the business end of a well-used K&D No. 2 cylinder plug stake
