Over the past 25 years of visiting The Sea Ranch, I've picked up quite a bit of Red Abalone shell (or "red" as we've come to call it) on the beaches. I wasn't sure what I would make from it, but I knew I'd eventually think of something cool.
Finally, I did. Well...at least I think it's cool...
I'm going to make some jewelry from it by inlaying it with opaque black epoxy resin. I'm not sure yet exactly what form of jewelry this would be well suited to, but first I've got to figure out a technique to make it work in any form.
Let's see how it goes.
|
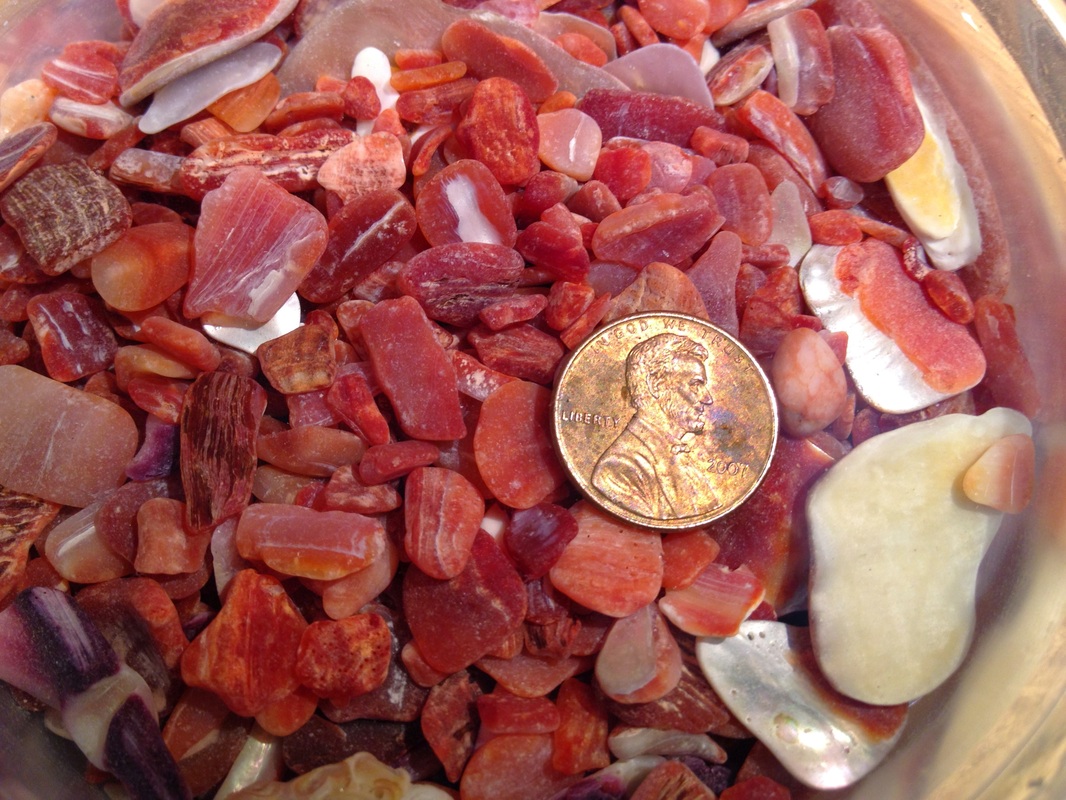
Over the years, I've asked folks that have gone to The Sea Ranch with me to pick up red whenever they came across it. Even so, it took a long time to find even the modest amount you see here.
Most of the red we find on the beach is well weathered and pretty small. It looks great underwater as you see it here, but it's very dull when it dries. Also in this shot you can see some purple and white shell. I pick that up too, for obvious reasons (obvious if you know my wife, that is.) |
|
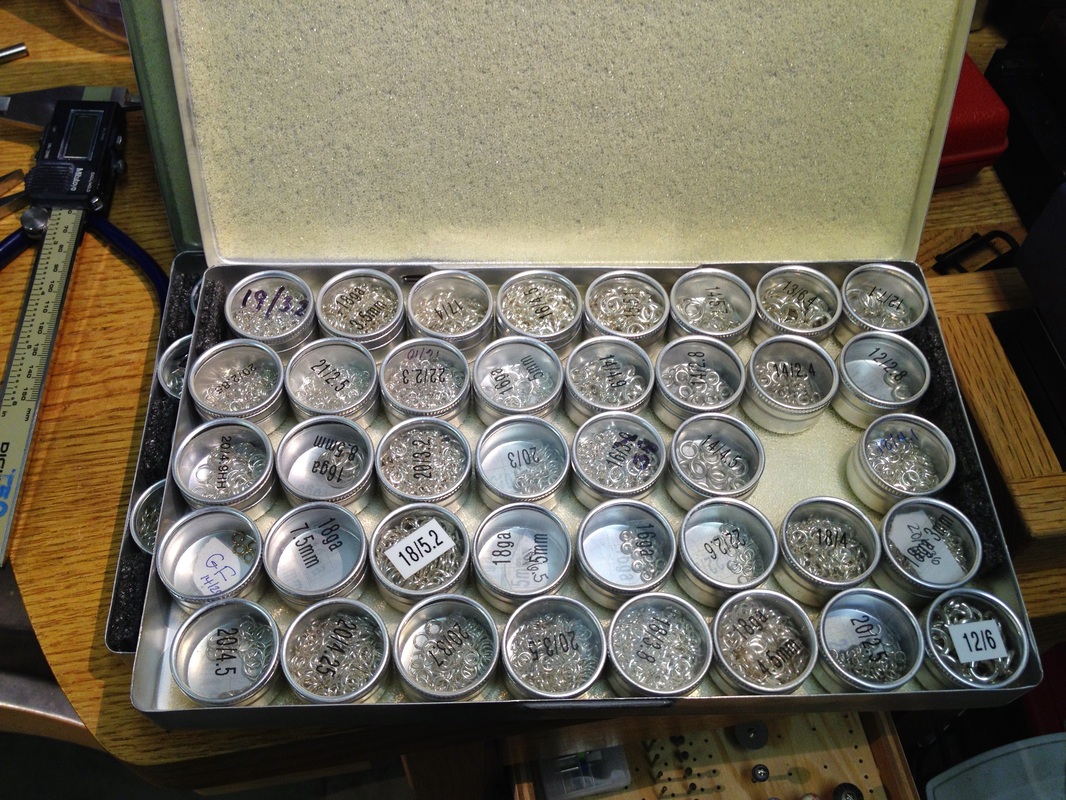
Time to make some settings for inlay.
Lets start with some simple round settings made from jump rings....of which I have many left over from the years when I actively taught chainmaking. I need a couple large diameter, heavy gauge rings for the settings themselves, as well as a couple of smaller rings for hanging the settings on a chain. |
|
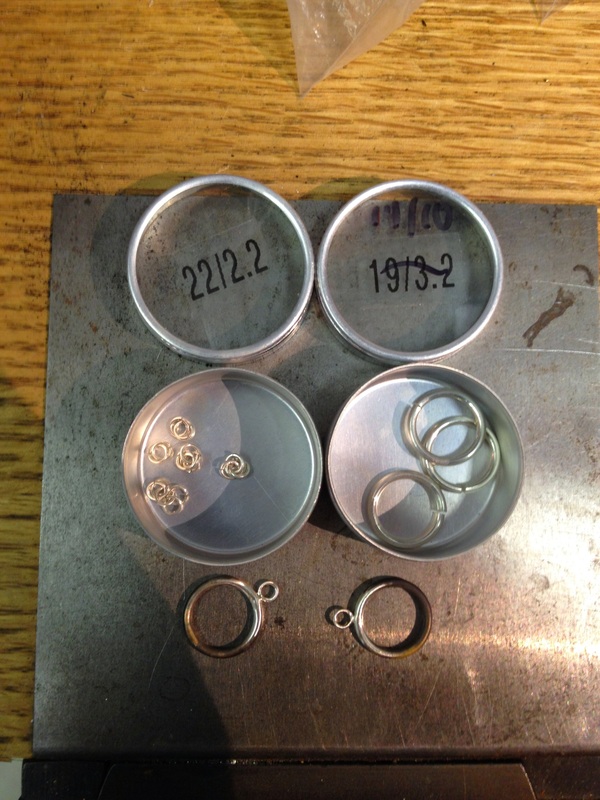
Found some likely candidates and silver soldered (brazed) them together.
The rings are labeled with the wire gauge from which they are made and the mandrel diameter on which they were made. Here we have some beefy 14 gauge rings made on a 10mm mandrel for the settings, and some 22 gauge rings made on a 2.2mm mandrel for the attachment. For those readers needing a translation from goofy historical measuring systems to modern units, 22ga wire is about 0.64mm diameter and 14ga wire is about 1.63mm diameter. Note the need to pickle off the oxidation after soldering...I wish these rings were Argentium sterling so I wouldn't have to worry about that. |
|
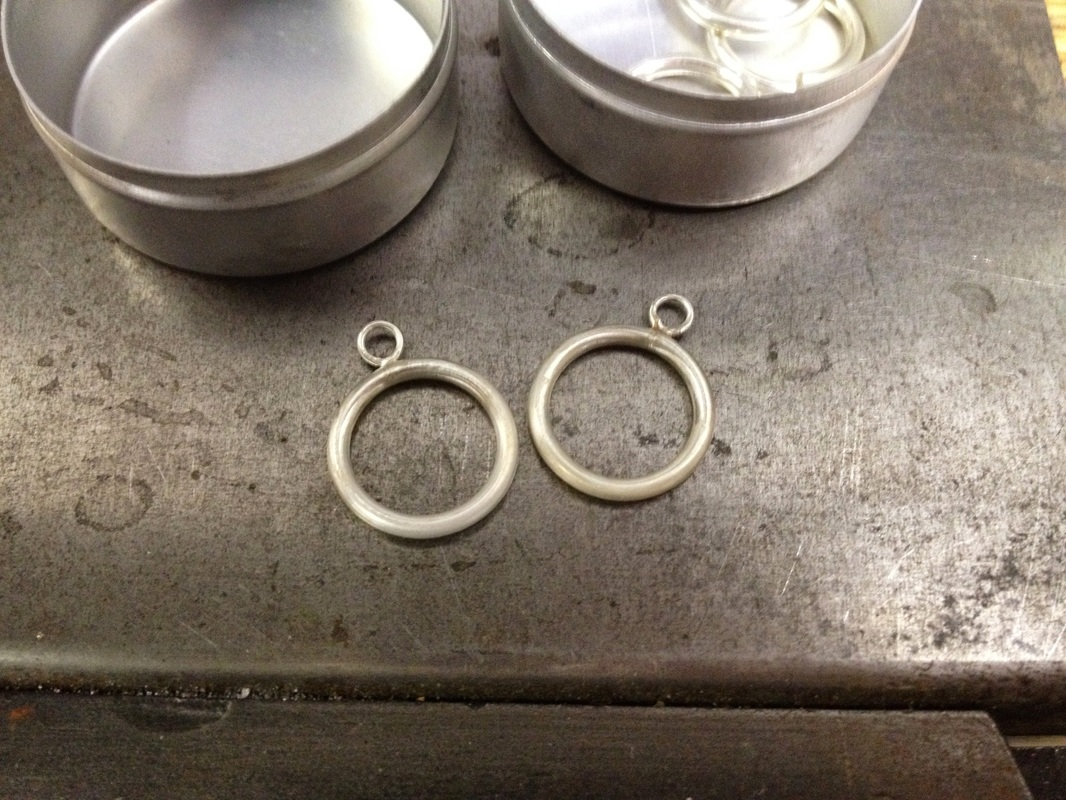
Settings after pickling. A quick polish with some 3M radial bristle disks and we should be ready to start the inlay.
3M radial bristle disks are great. I couldn't be without them at my jeweler's bench. |
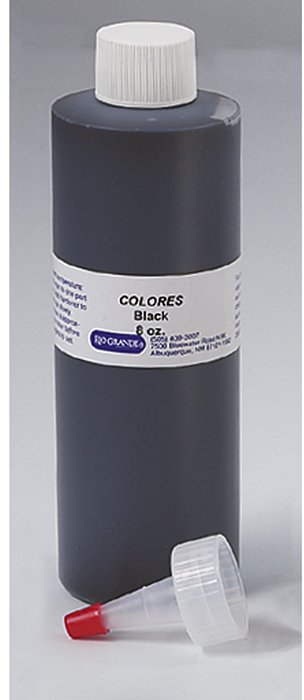
image from
riogrande.com |
Okay, we've got our settings. Now its time for some resin.
I've been using Rio Grande's Colores epoxy resins for years. They've always performed very well for me. The resins are available in many colors, both opaque and transparent...and now even glittery. Yikes. One of my favorite things about the Colores resins is that the uncured resin cleans up easily in denatured alcohol. There are many other kinds of resin available on the market these days, but I've yet to find any that clean up as easily as the Colores resins. Ease of cleanup is important to me because it enables me to minimize the amount of stuff I throw away. I usually clean up everything I've used (mixing cups, spoons, droppers, syringes, etc.) except my stir stick. And if you have a spill.... Another thing I like about the Colores resins is that they have a very long working time (pot life). You don't need to rush to get the project done for fear that your resin will gel on you when you are in the middle of it. The long working time brings along with it a long cure time (usually about 24 hours) , but I'm not usually in a hurry so it doesn't bother me. |

|
Time for a rant!
You will never catch me referring to epoxy resin as "cold enamel". Enamel is vitreous glass and nothing else. That said, I'm not a materials bigot. I like resin and enamels both just fine, and use whichever one seems like the right material for the project at hand. For example, this project would be impossible to do with enamels.The shell wouldn't survive the firing conditions required for enamel. What I object to is product marketing (either for the materials themselves, or for work made from those materials) that tries to deceive people into thinking that the two products are related or that the same results can be achieved with either material. The luminosity, depth, translucency, subtleties of shading, and intensity of color one can achieve with vitreous enamels is just not possible with resin and it's deceptive to imply that it is. End of rant! |
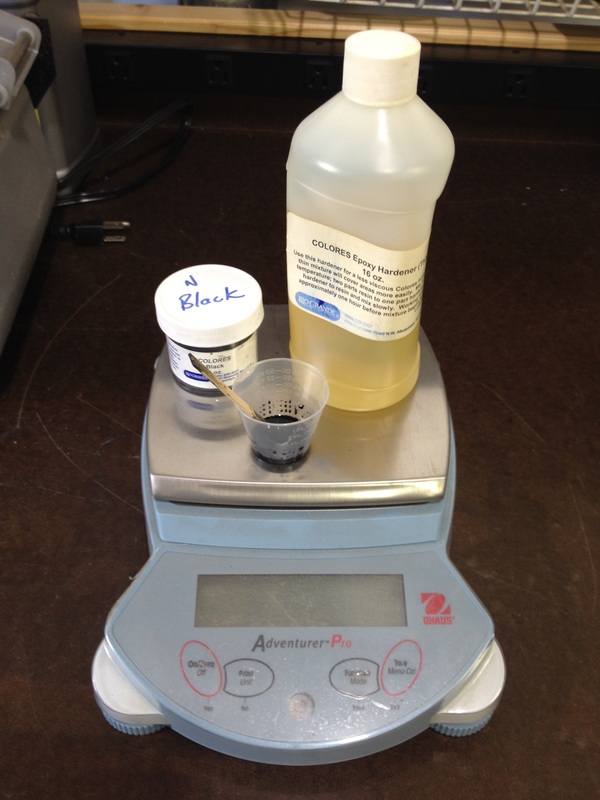
Here's all you really need to work with resin: the two parts of the resin, something to mix it in, and a way to measure it. We already covered the resin.
For mixing containers, I'm usually working with very small quantities so the little plastic cups that come with Colores kits are great. You can also get them at hobby stores or at plastic suppliers like Tap Plastics. And since I clean them instead of throwing them away, my very first supply of them is still going strong.
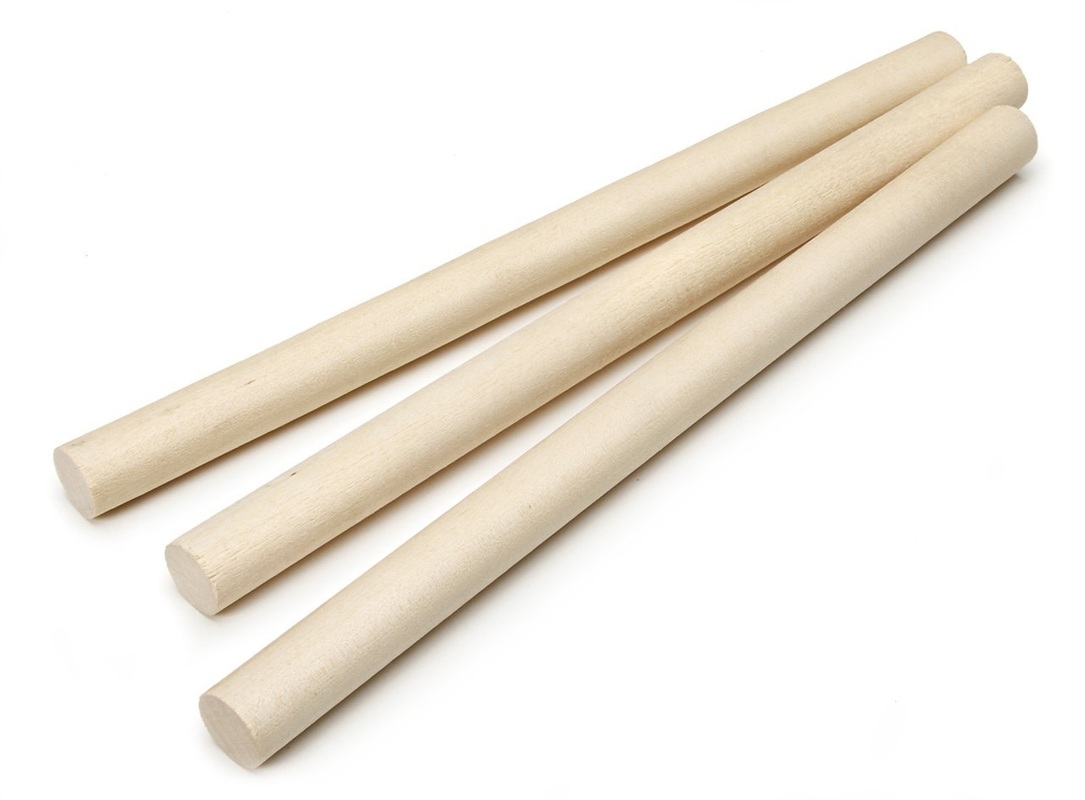
To mix the resin, I just use a short piece of wooden coffee stir stick. It would be better to use a plastic stirrer so that less resin would stick to it while mixing, but I have never bothered to go find something more appropriate.
To measure out the two parts of the resin, you can use volume or weight. If you don't have a scale, then volume is your option. I find it hard to measure small volumes accurately, and I have a scale, so I always use weight.
Using weight has one distinct advantage: the ability to make very small batches and waste less resin.
The Colores resin instructions state that one should never make less than a 15 gram batch (10 grams of resin, 5 grams of hardener) . I've found that this restriction can be ignored...if you can and do measure and mix carefully. The reason Rio Grande recommends that you use a larger batch is that small errors in measuring and less-than-perfect mixing have less of an impact on bigger batches. Rio is trying to give their customers the best chance at being successful every time they use the product. (An uncharitable soul might also observe that the bigger your batches are, the sooner you need to reorder resin...)
If you are going to work in very small batches (I routinely make batches as small as 2-3 grams), you need to measure VERY carefully to get the proper 2:1 ratio. You also need to mix the resin COMPLETELY to assure the the resin will fully cure. When mixing very small batches, try to minimize the amount of resin that you push up onto the walls of your mix container or onto your stir stick. It's a lot easier to get a good mix if all of the resin is actually in the bottom of the container.
Another part of the Colores resin instructions I've found can be stretched a fair bit is the shelf life. Rio Grande says that unopened resin has a shelf life of one year. I've found this to be VERY conservative. I've had some seldom used colors on hand for years, and they still cure just fine.
One thing that does happen over time is that the hardener yellows. If any one from Rio Grande ever sees this page, I'm sure they'll be horrified at the yellowed bottle of hardener in the picture. When the hardener is new, it's water clear and thus the cured Colores clear resin is beautifully clear. If you use yellowed hardener, your lighter opaque and transparent colors might be shifted a bit. I've never been bothered by this. That said, that bottle of hardener is looking pretty sad. Maybe I should just order a new one on general principles next time I place a Rio Grande order.
For mixing containers, I'm usually working with very small quantities so the little plastic cups that come with Colores kits are great. You can also get them at hobby stores or at plastic suppliers like Tap Plastics. And since I clean them instead of throwing them away, my very first supply of them is still going strong.
To mix the resin, I just use a short piece of wooden coffee stir stick. It would be better to use a plastic stirrer so that less resin would stick to it while mixing, but I have never bothered to go find something more appropriate.
To measure out the two parts of the resin, you can use volume or weight. If you don't have a scale, then volume is your option. I find it hard to measure small volumes accurately, and I have a scale, so I always use weight.
Using weight has one distinct advantage: the ability to make very small batches and waste less resin.
The Colores resin instructions state that one should never make less than a 15 gram batch (10 grams of resin, 5 grams of hardener) . I've found that this restriction can be ignored...if you can and do measure and mix carefully. The reason Rio Grande recommends that you use a larger batch is that small errors in measuring and less-than-perfect mixing have less of an impact on bigger batches. Rio is trying to give their customers the best chance at being successful every time they use the product. (An uncharitable soul might also observe that the bigger your batches are, the sooner you need to reorder resin...)
If you are going to work in very small batches (I routinely make batches as small as 2-3 grams), you need to measure VERY carefully to get the proper 2:1 ratio. You also need to mix the resin COMPLETELY to assure the the resin will fully cure. When mixing very small batches, try to minimize the amount of resin that you push up onto the walls of your mix container or onto your stir stick. It's a lot easier to get a good mix if all of the resin is actually in the bottom of the container.
Another part of the Colores resin instructions I've found can be stretched a fair bit is the shelf life. Rio Grande says that unopened resin has a shelf life of one year. I've found this to be VERY conservative. I've had some seldom used colors on hand for years, and they still cure just fine.
One thing that does happen over time is that the hardener yellows. If any one from Rio Grande ever sees this page, I'm sure they'll be horrified at the yellowed bottle of hardener in the picture. When the hardener is new, it's water clear and thus the cured Colores clear resin is beautifully clear. If you use yellowed hardener, your lighter opaque and transparent colors might be shifted a bit. I've never been bothered by this. That said, that bottle of hardener is looking pretty sad. Maybe I should just order a new one on general principles next time I place a Rio Grande order.
|
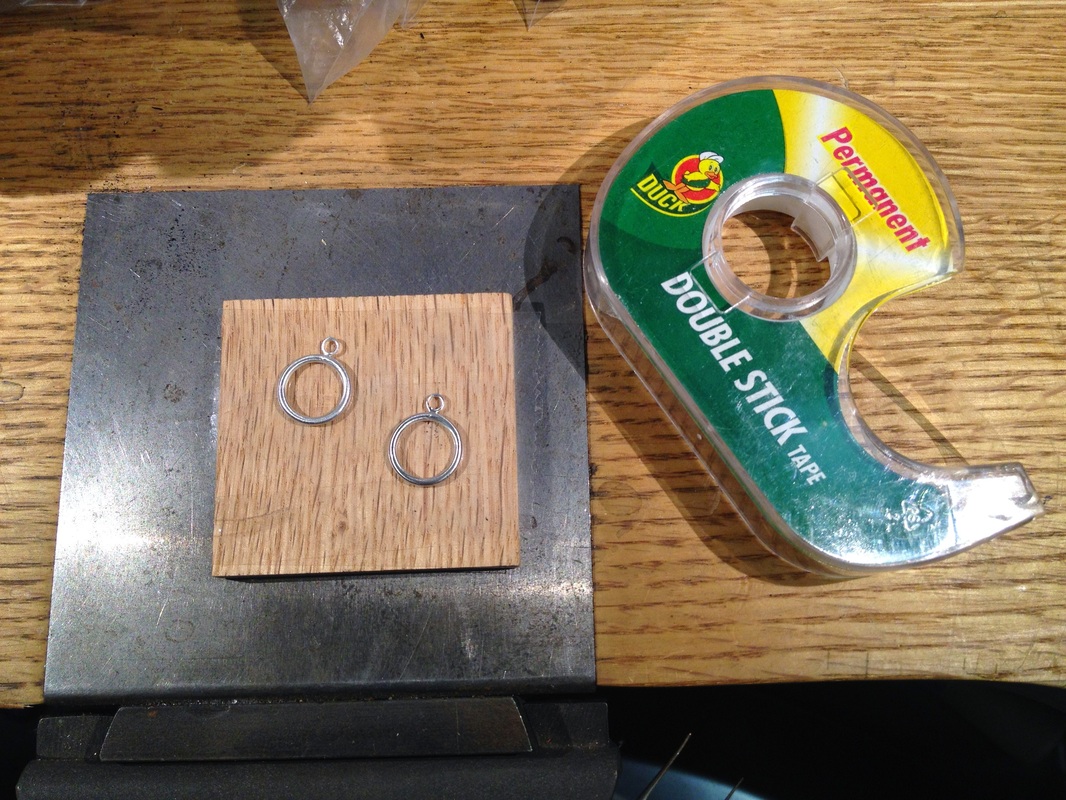
First try at holding down the settings so that the shell and resin can be inlaid. Double-sided tape on a scrap of wood.
This proved too fussy to manage and I abandoned it in favor of shallowly embedding the settings into water-based pottery clay. Which, of course, turned out to have its own issues... |
|
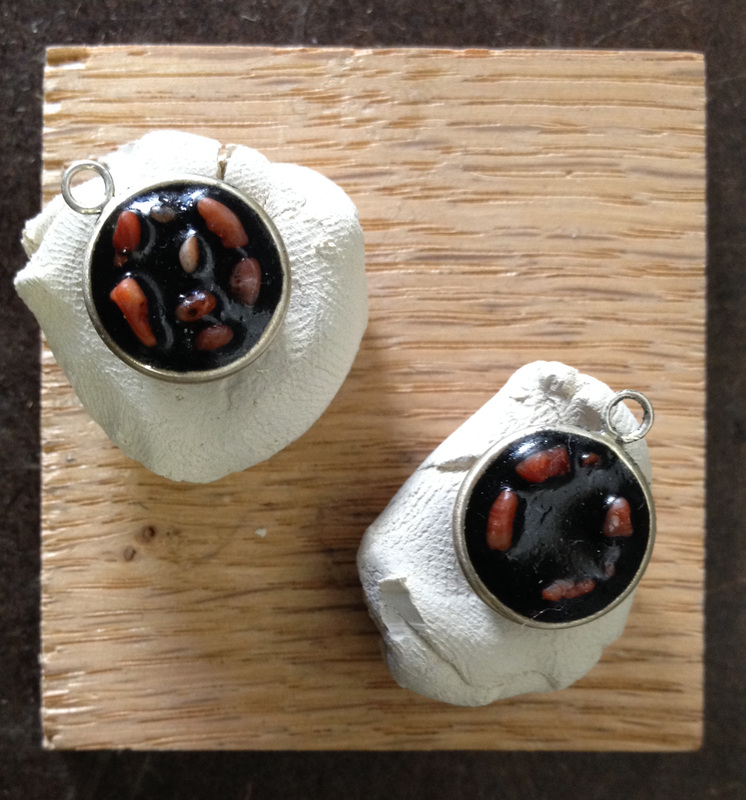
Settings fixed to little blobs of pottery clay.
The idea was that with the clay beneath the ring, I could push pieces of shell down far enough that they would come out the other side of the setting and then stick into the clay to hold everything in place. Turns out that the clay did way too good of a job at holding everything in place! Also, the clay became trapped in the surface of the resin much more deeply than I expected and proved very difficult to remove. Another beautiful theory slain by an ugly fact. But it's still worth trying to take these to the next step. |

|
Yup, the clay was a bad idea.
It even managed to hold on tight enough that I broke some of the shell bits when I pulled the dried blob of clay off the piece. In hindsight, I guess I could have soaked the pieces in water for long enough to at least soften if not dissolve the clay away. But I'd still have clay embedded in the resin where the clay came into contact with the "wet" resin. |
|
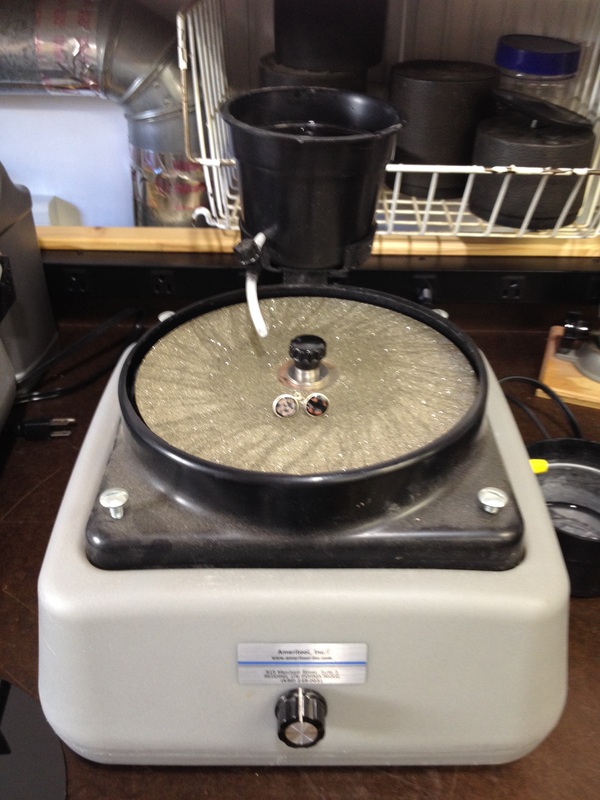
The next step is to grind the shell and resin back so they are flush with the surface of the setting.
To do this, I start out with an 8" flat grinder/polisher I bought from Ameritool Inc. up in Redding, CA. I have diamond grinding disks for the machine from 60 girt to 600 grit. The diamond disks make very short work of something as soft as shell and resin...they are designed to cut stone. In addition to the diamond disks I've purchased directly from Ameritool, I've also had good luck with diamond disks from Dave at jadecarver.com. Dave does mail order and also can be found at many of the gem and mineral shows in Northern California. Dave's diamond disks are less expensive than the ones from Ameritool, but they come unmounted. So, I needed to make some backing disks. I laser cut them from 1/4" clear acrylic sheet at TechShop San Jose. 3M Super 77 spray adhesive has done a good job of holding the disks and backings together. |
|
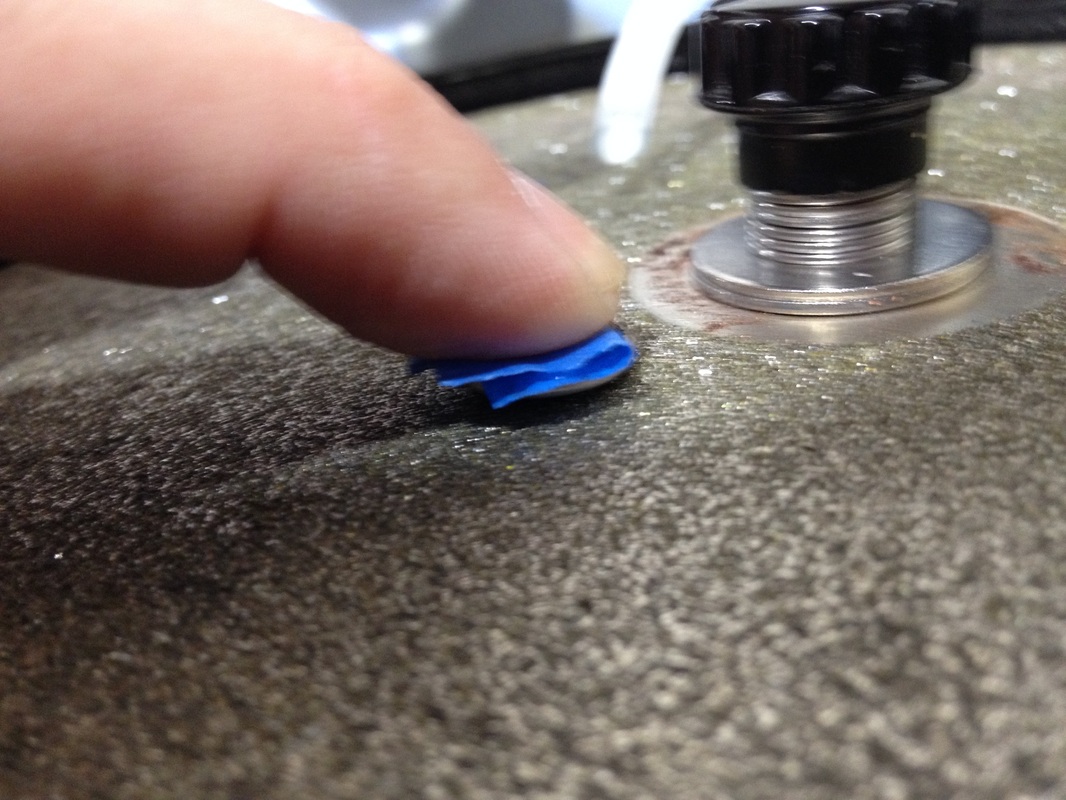
Hanging on to such small pieces to grind them can be a bit of a trick. Usually a lapidary would use dop wax or glue to stick the work to the end of a stick that would then function as a handle. After the pottery clay fiasco, I didn't want to stick anything to the shell so I just held onto the settings the best I could until I had ground a good sized flat spot on one side.
Then, I could use some 3M blue painters tape (one of my favorite tools of all time!) to stick the piece to my fingertip and grind on from there. If the tape gets wet, it loses its tack immediately, so I need to try to keep the grinding water off of it. I ended up making quite a few little tape pads as I worked. Apologies for the blurry cell phone picture. Even with the grinder off, it was a balancing act to get this shot. |
|
The coarse grinding disks remove material quickly and leave a very rough finish.
|
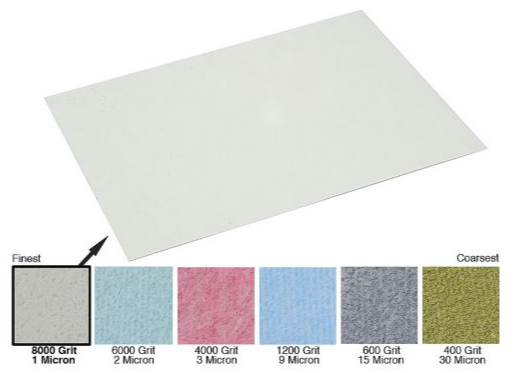
image from
ottofrei.com |
After grinding the surfaces as evenly as possible up to 600 grit, I switched to manual polishing.
My first try was to use another of my favorite tools: 3M Wetordry polishing paper. Although I love this stuff for use on non-ferrous metals (silver, copper, brass), the alumina oxide abrasive in the relatively soft paper wasn't tough enough to cut the shell. |
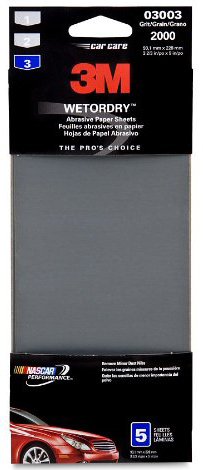
image from
amazon.com |
Back to the old school method: 3M Imperial wetordry automotive sandpaper
3M is rightfully proud of this stuff, so it costs about $2 a 9x12 sheet or $1 a sheet for the smaller size shown here. But it does a great job of cutting shell and epoxy so it's worth it. |
|
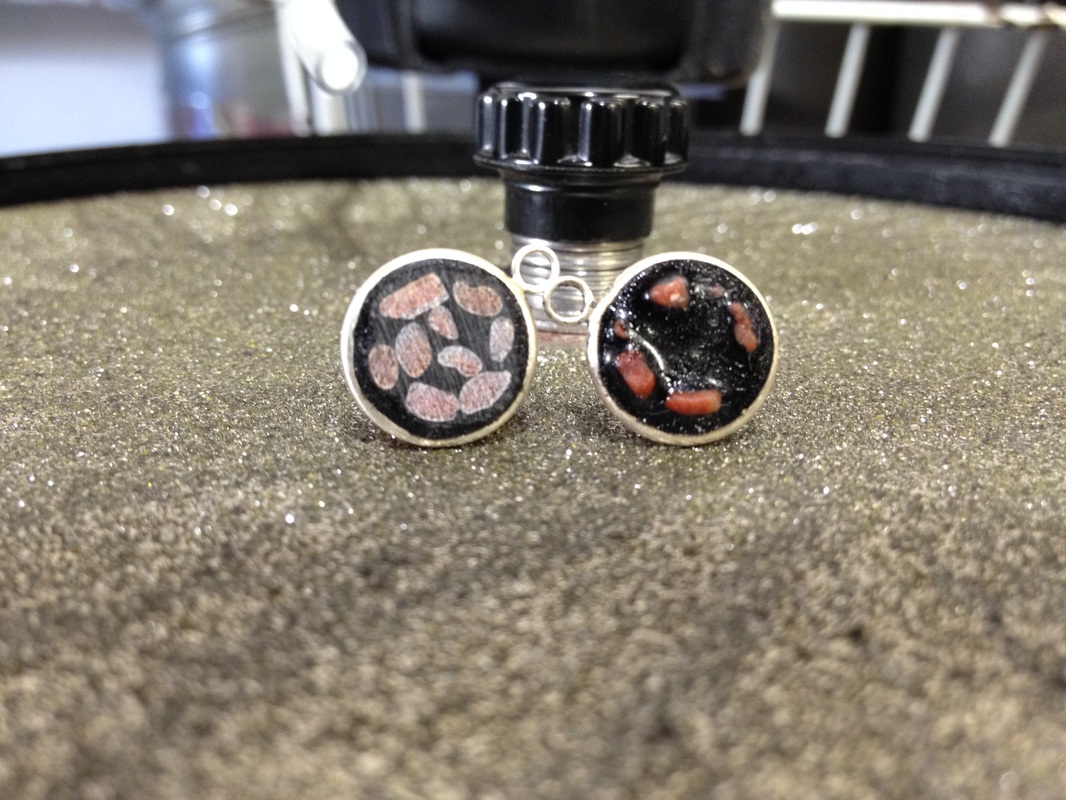
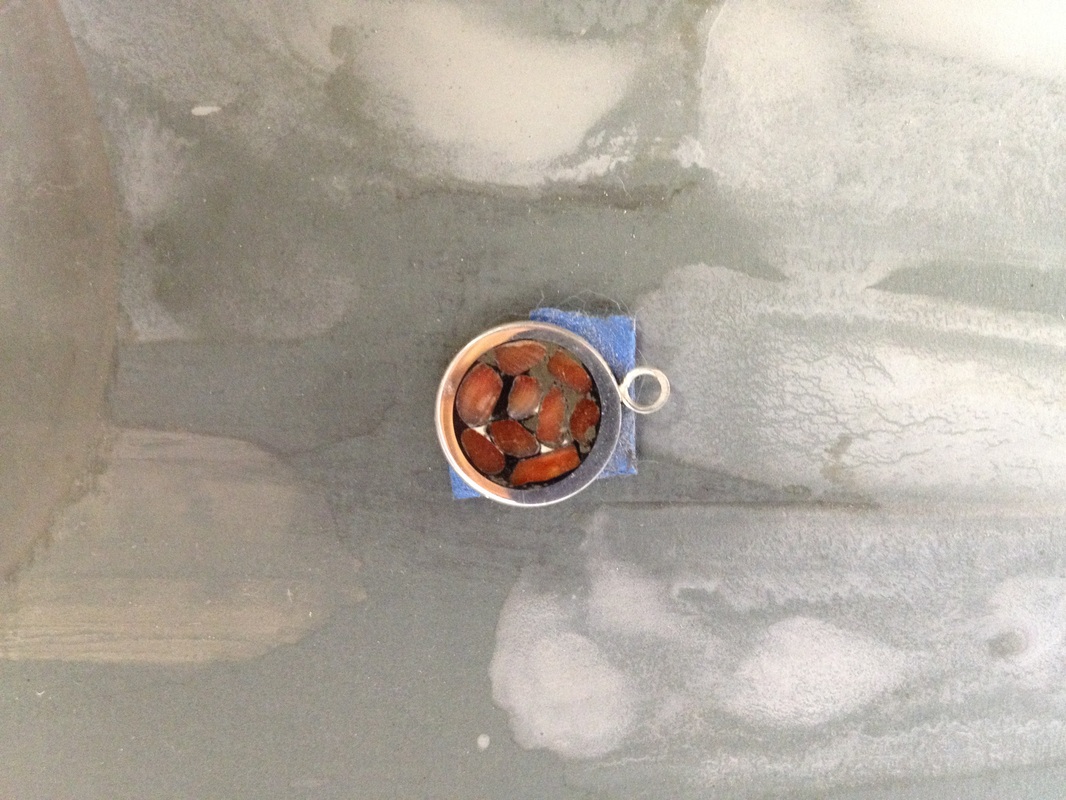
You can see the shine starting to come up on the shell and epoxy.
You can also see a potential disadvantage of using jump rings to make the setting. The width of the setting is varying a little based on the exact amount I've ground off any part of the ring. In theory, if I was grinding a perfect flat surface parallel to the plane of the ring, the ring should look the same width all the way around. Wish me luck with that. |
|
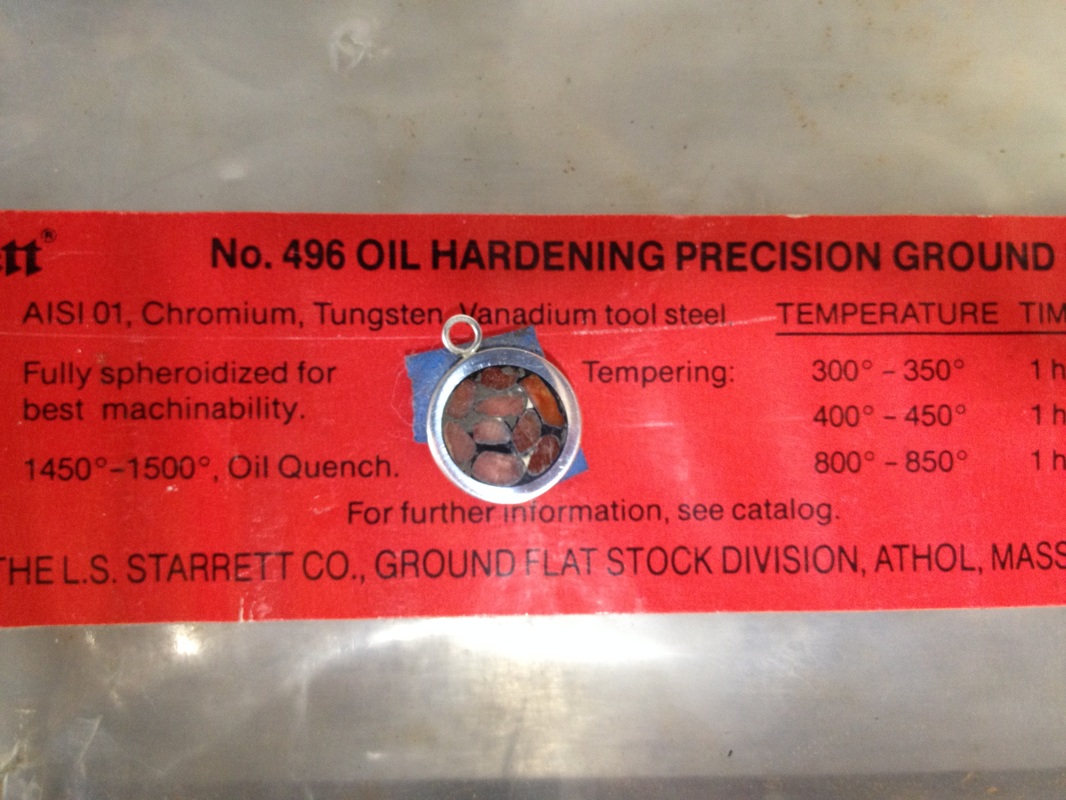
When trying to grind or polish a really flat surface, your sandpaper needs to be on a really flat surface. I've used thick sheet glass in the past, but lately I've been using a piece of 5/16" thick Starrett precision ground steel flat stock because I don't have to worry about breaking it.
At some point I'll need to make something out of this steel because it's very high quality, expensive stuff. But in the meantime, it's a great backing surface for polishing. Now it's easy to see the clay coming back to haunt me...can I get that whitish stuff out from between the shell pieces? If not, these pieces are headed to the scrap pile & I'm headed for a restart on the project. |
|
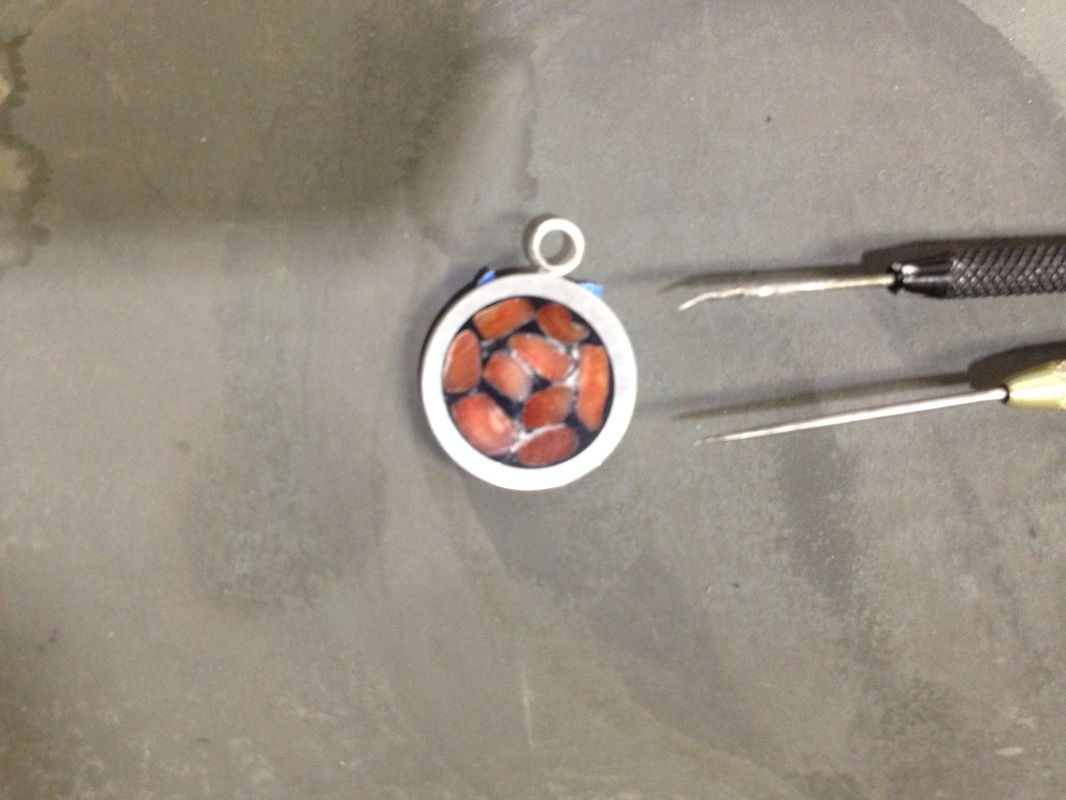
By coincidence, I just received a mixed lot of old watchmaker's tools I bought on eBay. In the lot was a wicked set of picks/probes/scrapers.
I hope I can use them to remove enough of the clay that I can touch up the epoxy by adding another layer & grinding the surface back to flat. I also hope I won't stab myself with any of them. I'm pretty sure my tetanus shots are up to date, but still... |
|
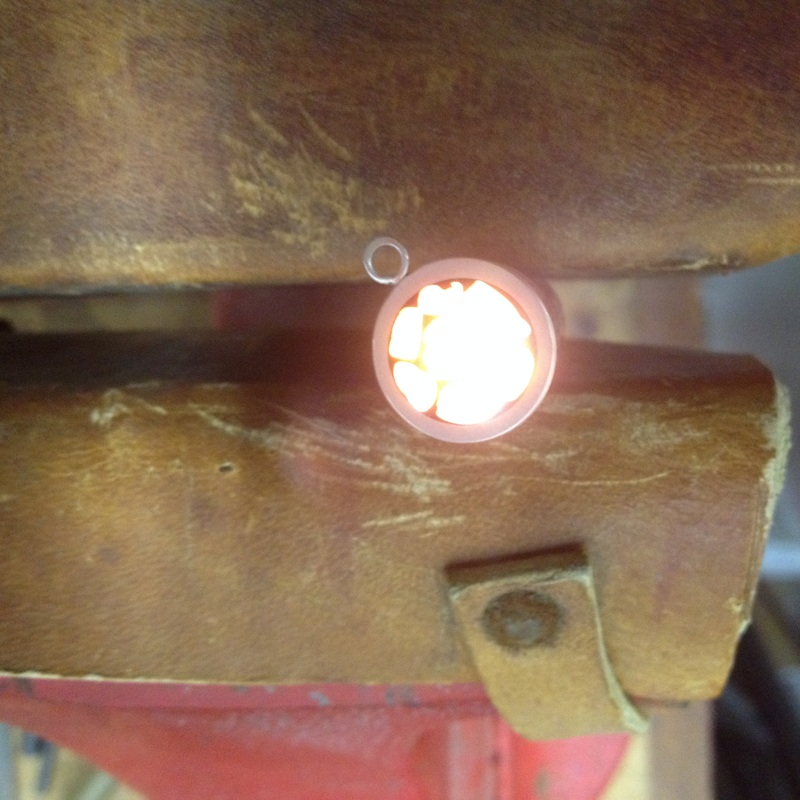
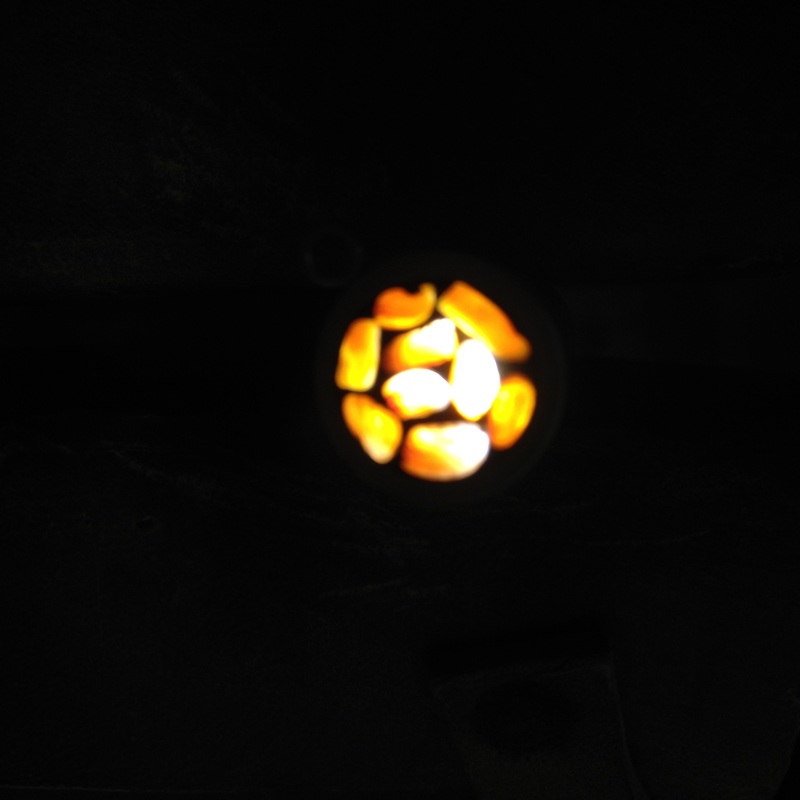
As I was working on the clay removal, I happened to hold the piece such that it was backlit...and discovered that the shell is translucent! So, of course I had to stop and check it out.
These two shots are taken with the piece set on top of my tiny Streamlight Nanolight held in a vise. Much cooler looking in person than my cell phone camera was able to capture. I don't know if the finished pieces will actually look translucent in typical lighting conditions, but it was fun to discover the effect. |
|
|
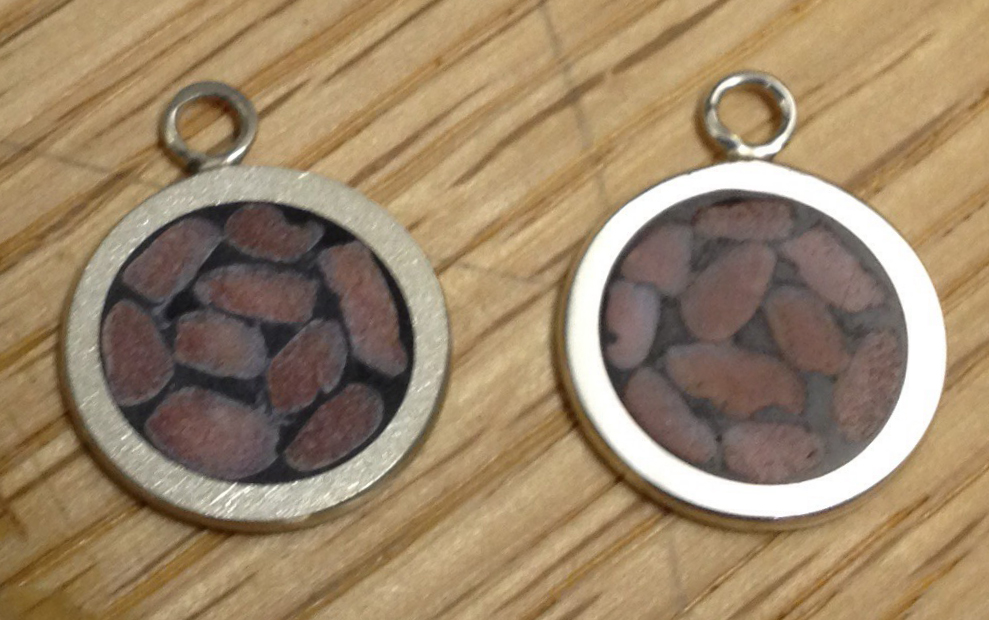
Scraping out the clay residue and recoating with black epoxy worked reasonably well. There is still a bit of white visible, but both pieces are much improved.
At left is an in-progress shot of the two pieces. The one on the left shows what the surface looks like after the recoated epoxy was taken down to 220grit on the diamond grinder. Then one on the right shows the cleaned up silver surfaces after a little work with files, sanding sticks, and 3M radial bristle disks. Apologies for the blown out image...that shiny silver is really shiny! |
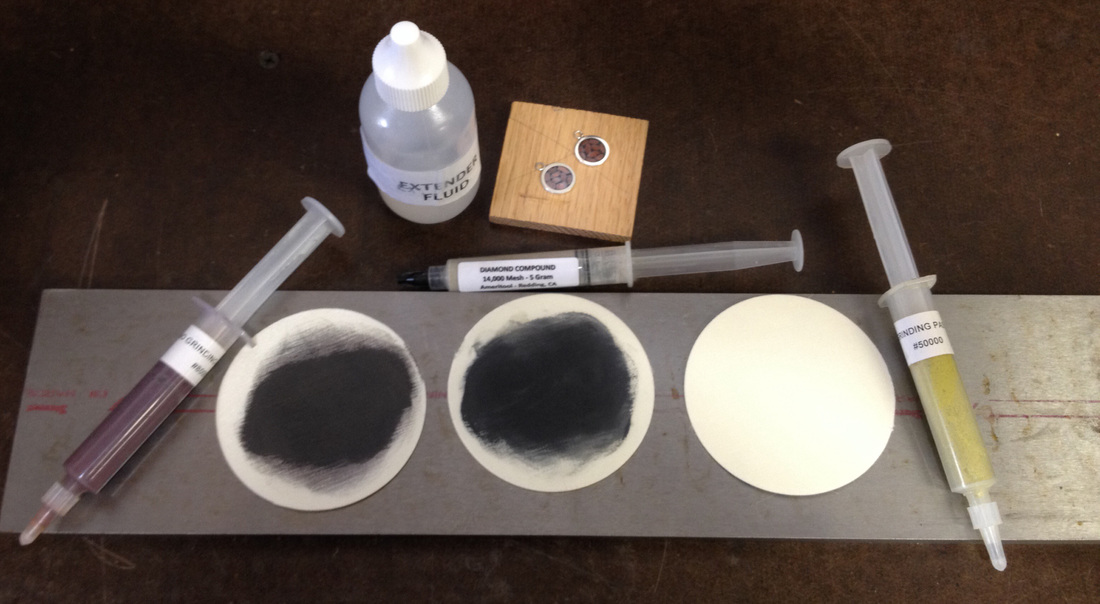
Getting ready to polish at 50,000grit |
After a trip through 400grit and 600grit diamond wheels followed by 800grit and 2000grit 3M Imperial wetordry automotive sandpaper, it was time to move to diamond paste polishes.
Diamond paste polish is available from many places online. I bought mine from Ameritool Inc. up in Redding, CA (the same place my grinder came from). Using the diamond paste isn't much different from using sandpaper, except that you need some sort of substrate to hold the paste while polishing. |
|
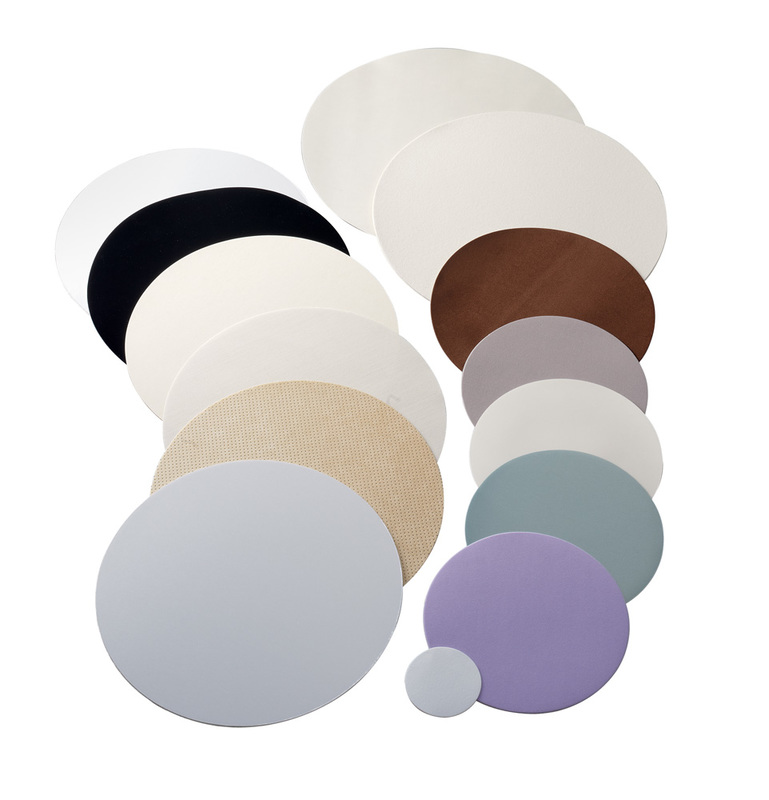
I had some 76mm circles of some sort of woven polysomethingoranother fabric salvaged from a lab polishing kit. They were made by Buehler, one of the big players in the world of lab sample prep.
Buehler offers all sorts of different cloth sizes and types. I have no idea what kind I have or if it's the best kind for the job, but it seems to work fine. The process is pretty straightforward. Squeeze out a little paste from the syringe, add a drop or two of extender, gently smear the two around with the piece you are going polish. Polish away! The extender fluid is a water and oil soluble liquid that helps you get the paste distributed on the substrate. Extenders are made of various things such as glycerin, propylene glycol methyl ether (PGME), and propylene glycol. The extender liquids, like all chemicals, can be harmful if misused. If you don't know how to work with hazardous materials safely, don't work with them at all. |
|
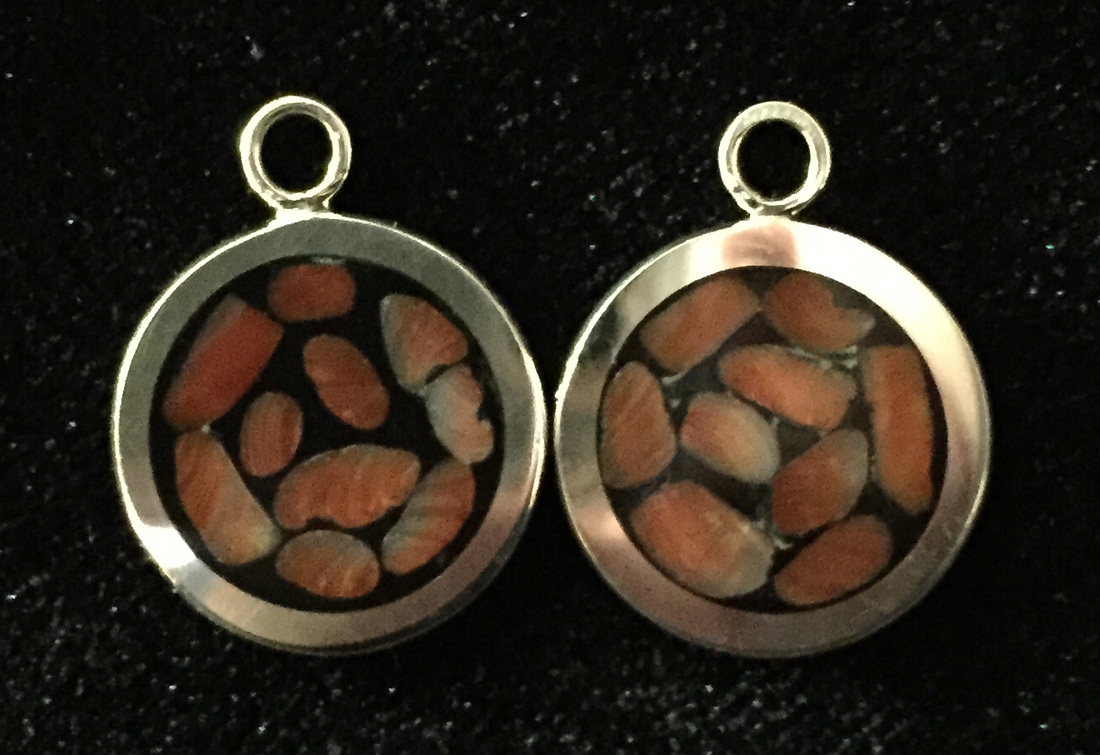
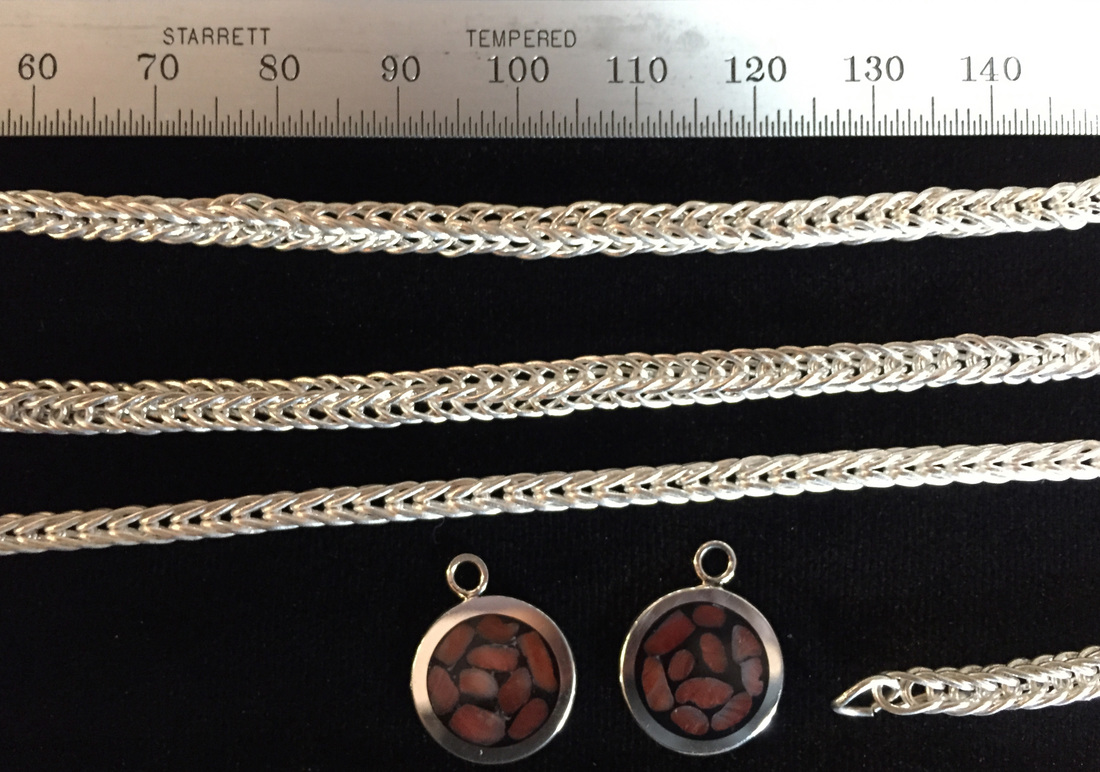
The finished pendants.
There is still some whitish clay residue visible, but only in a zoomed in view like this. At normal pendant viewing distance (ahem...) they look pretty cool. Too bad you can't see the glass smooth surface in this picture. Someday I'll be able to take decent pictures of things like these. |
After an long session of manually polishing the pieces by sticking them to the tip of my index finger with tiny rolls of 3M blue painters tape, I decided I needed a better (faster) method. I think I'll make some small platens (the size of the polishing cloth circles) that screw onto the shaft of my diamond grinder. The cloth circles have a pressure sensitive adhesive on the back so the will stick to the platens easily. After I get these made, I can use the diamond pastes the same way I use my diamond grinding discs.
Stay tuned...
Stay tuned...
Time to finish the pieces so I can give them as gifts.
I decided to hang these pendants from hand-made fine silver chain in a loop-in-loop pattern.
I really like loop-in-loop chains. This is likely due to their ubiquitous use in antiquity. Many of the finest surviving pieces of ancient jewelry are hung from (or somehow otherwise incorporate) loop-in-loop chains. Maybe some of the beauty created by the ancient goldsmiths will rub off on my work! At some point I'll do a project page on making loop-in-loop chains from scratch. For now, I'll just describe the final steps needed to create the chain I need for this project.
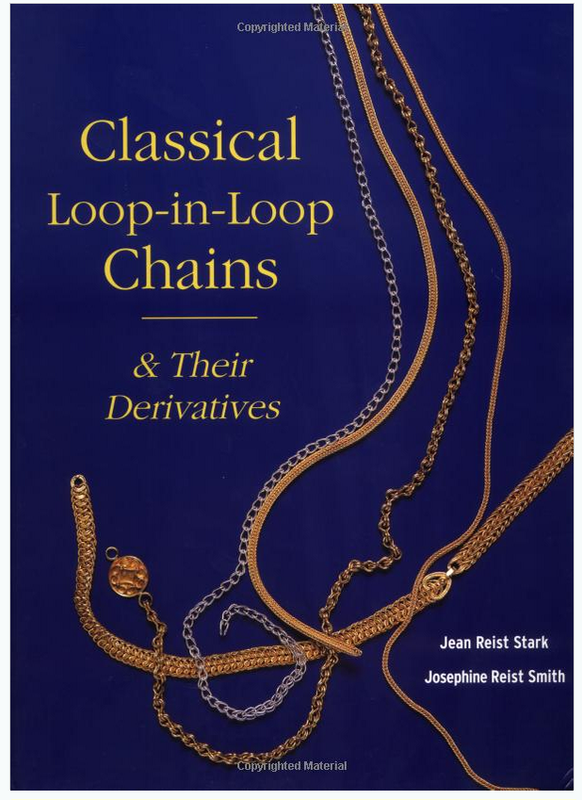
image from amazon.com |
In the mean time, if you want to learn about loop-in-loop chain making, have a look at Jean Stark's excellent book on the subject.
Jean's book is the book on ancient chainmaking and contains all the information you'll need to get started. I was lucky enough to take a chainmaking workshop from Jean at the Revere Academy a few years back. Learning directly from Jean was even better than the book! Fair warning: There are a lot of loops in these kind of chains. If you aren't patient or can't get into the flow of a repetitive manual process, this craft probably isn't for you. |
|
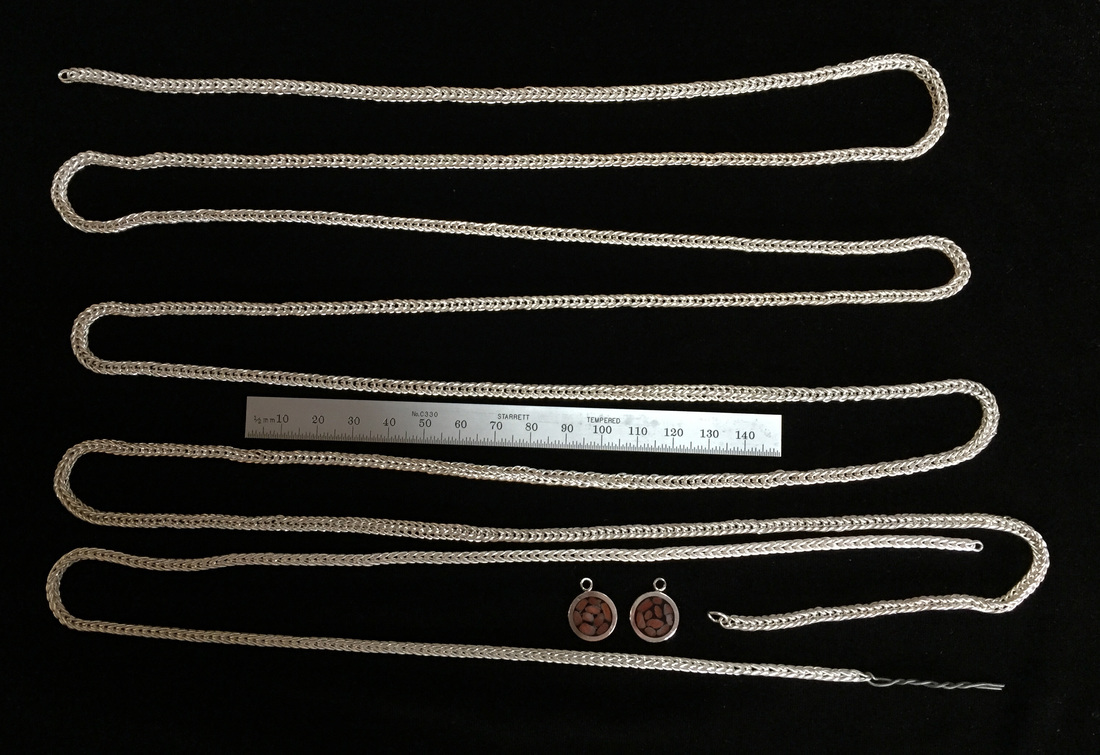
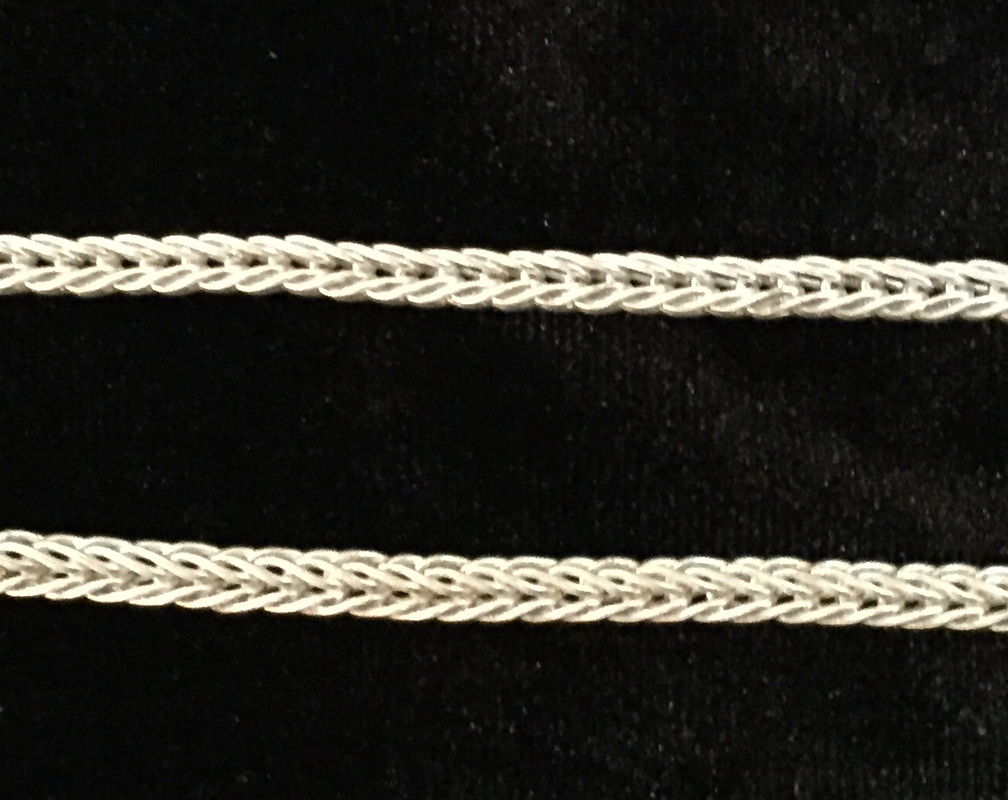
Awhile back I went on a loop-in-loop binge and made a very long piece of 24ga(?), 1-way, double loop-in-loop chain. I made it assuming that at some point I'd cut it up into whatever lengths were useful for the project at hand.
I guess it's time! As you can see from the picture at left, the chain is about 78" (~200 cm) long. Plenty to make a few projects. |
|
In fact, it's even more useful than it might appear.
The long piece isn't quite finished yet, which can be seen in the detail shot at left. It's still unevenly woven, fairly loose, and beefier than it really wants to be. But all that can be fixed! The shorter piece of chain in the shot is the same chain when it's all finished. After the loops are all assembled, the next step in making many loop-in-loop chains is to draw them through a jeweler's tool called a drawplate. |
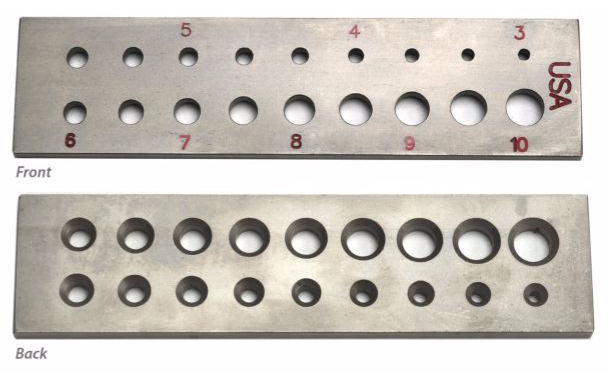
image from ottofrei.com |
At left is a commercially available chainmaker's drawplate from Otto Frei.
These plates are used in the same way wiremaking drawplates are used. By pulling the material through a series of successively smaller holes, the cross section of the material is reduced. Of course, the holes in wiremaking drawplates are smaller and the hole-to-hole size difference is much smaller as well. |
|
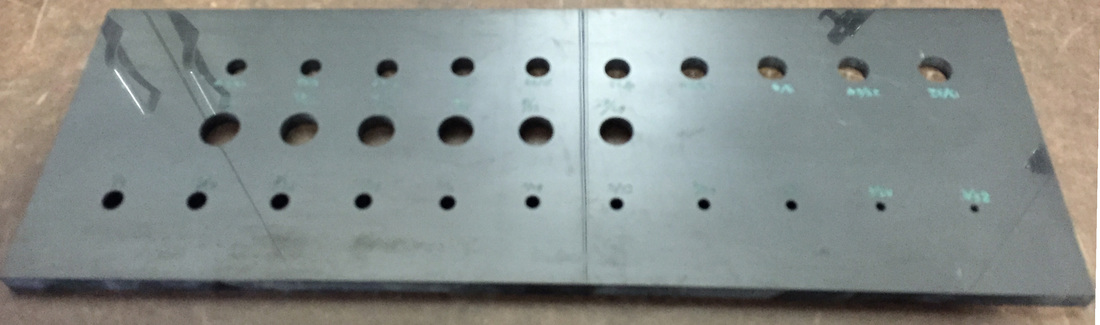
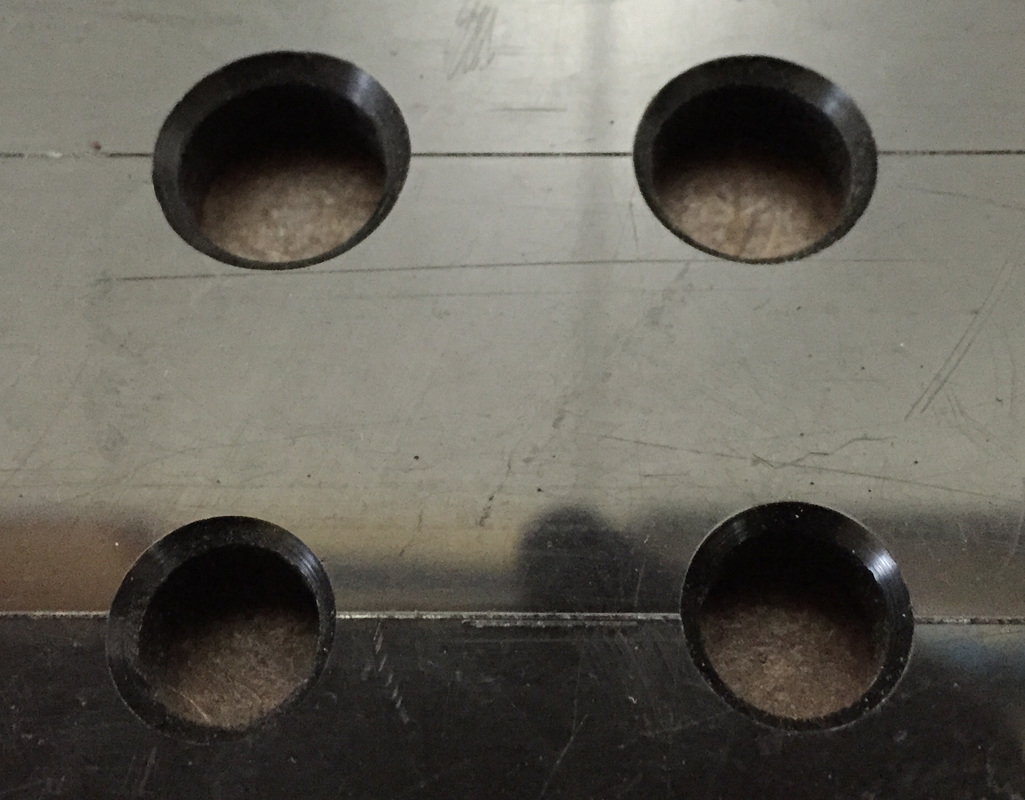
When I got into making loop-in-loop chains, I decided to make my own drawplate from a rectangle of 1/4" thick (~6.3mm) black Delrin (acetal) plastic. I drilled a series of holes in it with every reasonably sized bit in my 1/16"-1/2" by 64ths twist drill set.
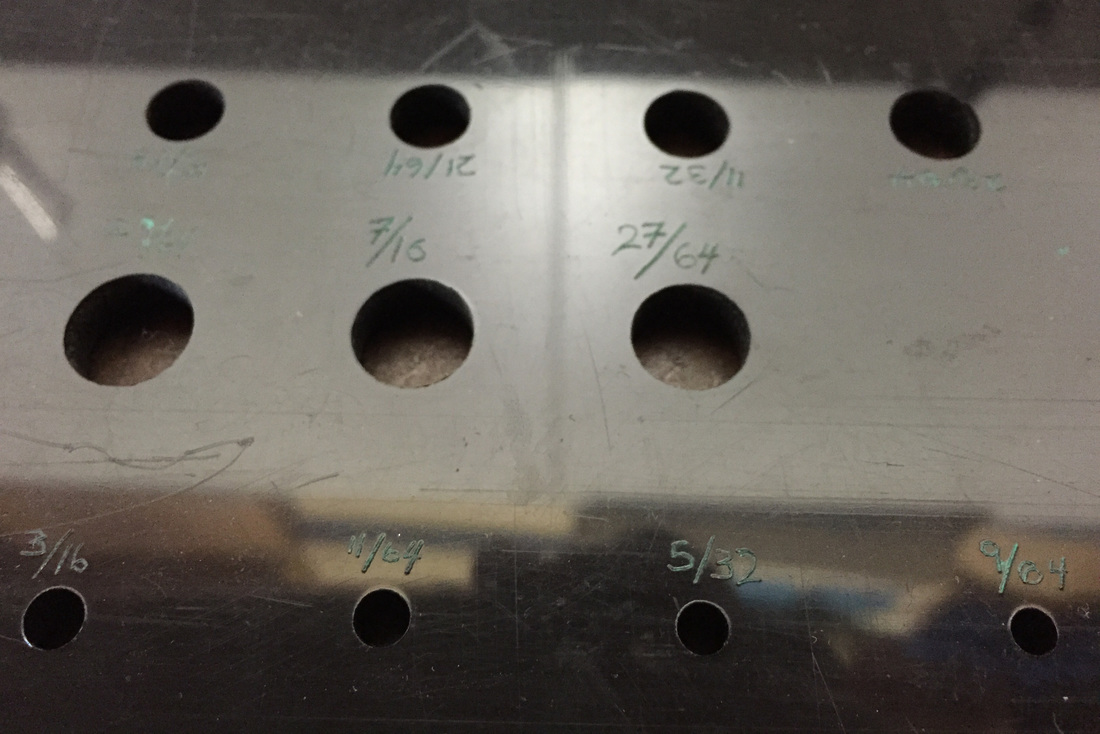
Delrin is a good material for this kind of tool because it is slippery. Chains slide through holes in an unlubricated Delrin plate more easily than a steel plate (see above) or one made of most other plastics. Steel plates can also more easily scratch the chain as it's drawn. To mark the hole diameters, I scribed the size next to each hole and rubbed in some green paint. The 1/64" (0.4mm) increment in hole size is about twice as fine as the commercially available plate shown above. So using this one is also gentler because each trip through the plate reduces the diameter half as much. |
|
On the back of the plate, each hole was given a shallow countersink to insure that the edges of the hole wouldn't catch on any irregularities in the chains as they were drawn through.
|
|
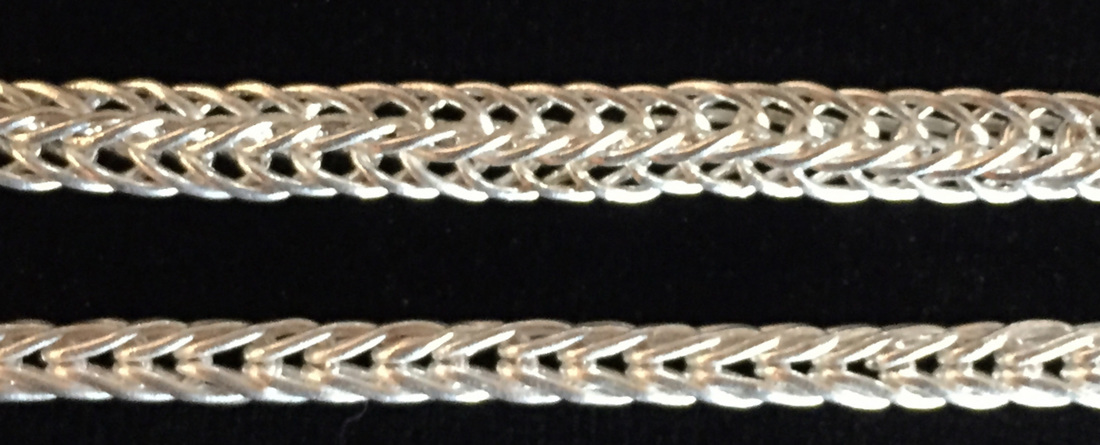
Before drawing, the chain is about 5mm (~0.200") wide/tall (the chain is sort of square in cross section). It's also not very uniform.
After drawing, the chain is about 3mm (~1/8") wide, much denser, and very uniform. The drawplate won't fix a really badly woven chain, but it will take most of the variation out of one that's reasonably good. For this chain pattern made in fine silver, the size reduction is small enough that annealing is not required during drawing. Metals (such as sterling silver) that work harden more readily might need to be annealed half way through the reduction. |
|
I started drawing in the 11/64" (~4.4mm) hole and drew down through four holes to the 1/8" (~3mm) hole. It required very little force to pull the chain through the successive holes. I just put a twist of wire on one end and pulled it by hand. Drawing wire is a very different experience!
After drawing the chain down to about 3mm (~1/8"), it is now 86" long (~218cm), so it stretched by about 10%. More to work with! Normally when making chains you are aiming for the particular length needed for the project at hand. It's good to know about how much the chain will lengthen during drawing so you don't waste time and materials making more chain than you need. |
|
Sorry, no annealing pix. It's kind of hard to hold the torch and take pix at the same time...
It's also a bad idea to take your full attention off what you are doing with the torch when you have it going. That flame is hot! |
Although annealing isn't required during drawing, after having been drawn down to about 3mm the chain is a bit stiff. It might be possible to cold work it back to full flexibility but there's no harm in annealing it and it's good practice to do so.
Since this is fine silver, it anneals at black heat. So if you get it glowing you're well past the required annealing temperature. It's a real bummer to overheat and partially fuse a loop-in-loop chain together after you have all this work into it. Trust me on this one... As always, a jeweler's torch is a potentially dangerous piece of equipment. If you don't know how to use dangerous equipment safely, don't use it at all. |
images from amazon.com |
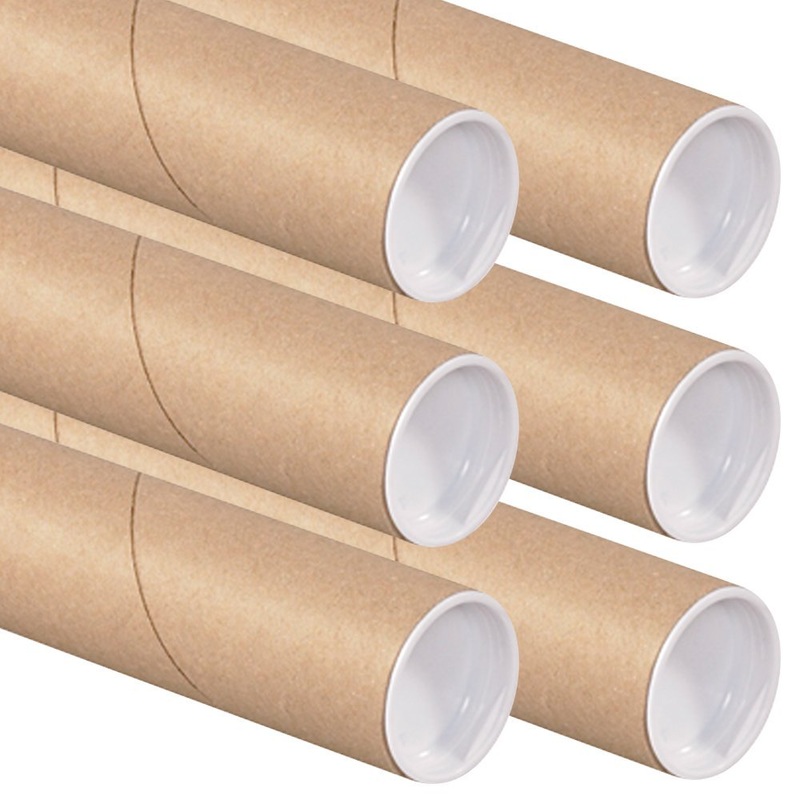
The chain will be a bit stiff and crackly when you are done annealing. The next step is to work the chain over a cylinder (a cardboard mailing tube is ideal) about 2"-3" (~50mm-75mm) in diameter to start to restore it to full flexibility.
Gently, but firmly, pull the chain back and forth over the cylinder until all the crunching noises are gone. Turn the chain a quarter turn and repeat the process until you've done all four "sides". The chain should now feel very smooth and bend easily in all directions. Keep going until it does. After the chain drapes smoothly at the radius of the tube you used, find another smaller cylinder (like a wood dowel) about 1" diameter and repeat the process. Be careful not to work any twist in to the chain as you go. The square-ish shape of this chain makes it easy to see if it is twisting. When you are done, the chain should feel silky smooth and drape nicely around your neck in all orientations. |

image from andreamontgomery.com |
For a typical pendant, I usually aim for about 16" (~405mm) overall length in the finished piece. At this length, I always err on the long side if there is any uncertainty in how long the piece will turn out.
There are many charts available on the internet that are similar to the one at left, from andreamontgomery.com. These will give you a general idea of where the pendant will rest for a given length of chain. |
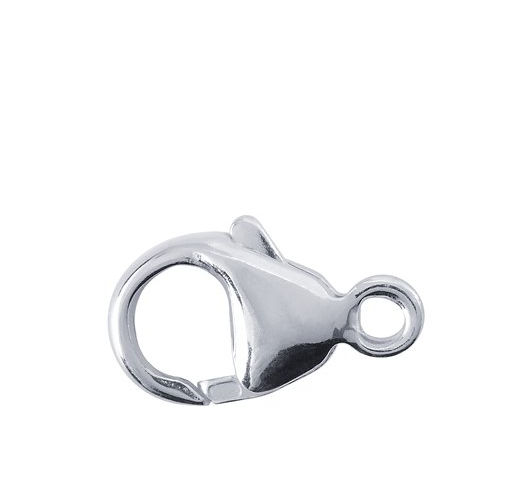
image from riogrande.com |
Before cutting the chain to length, I need to decide on the clasp.
For clasps on my handmade chains, I usually opt for security over aesthetics. Losing a piece like this is a real bummer and few people (other than jewelers!) will bother to look at the clasp on a piece. My go-to clasps are simple sterling silver lobster clasps (sometimes called oval or teardrop lobsters), available from most jewelry industry suppliers (such as Rio Grande and Otto Frei). These clasps, combined with a stout (e.g. 16ga) jump ring on the other end of the chain, make for a very secure closure. It does look a bit mass produced, but it isn't going to come open on it's own! |
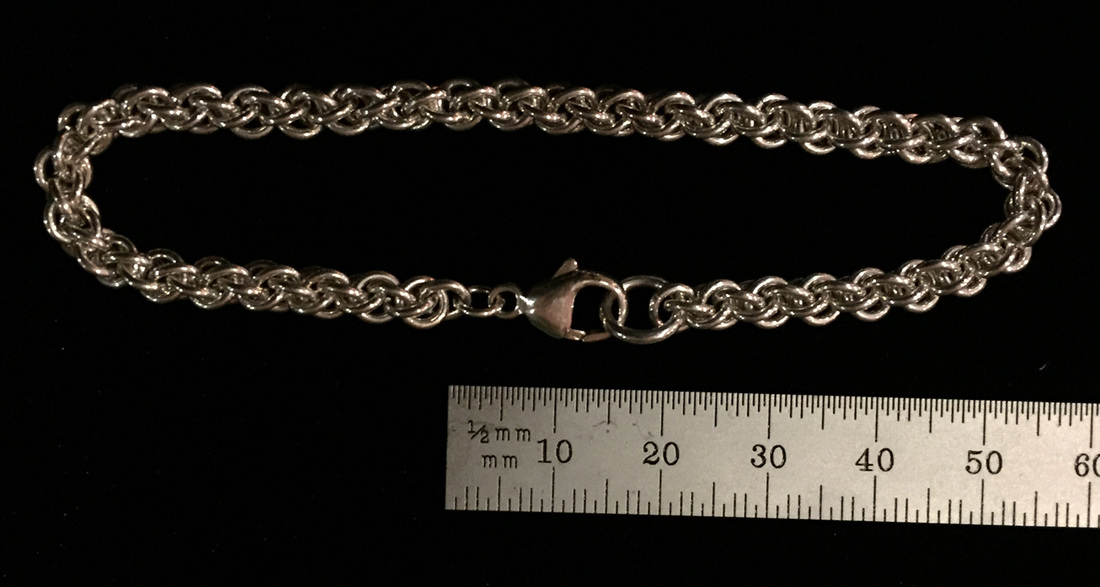
Clasp on a 16ga sterling silver bracelet in the Jens Pind pattern.
|
The clasp, the small ring that joins the clasp to the chain, and the larger ring on the other end of the chain add up to about 3/4" (~19mm). So my cut chain length should be about 15 1/4" (~390mm).
From the 86" length of chain, I can easily make five 16" chains w/ clasp with enough left over for a bracelet, or barely make five 18" chains w/ clasp. Plenty of options. It took more courage than I expected to actually cut this length of chain into pieces. Will I ever make another 7+ foot long chain? |
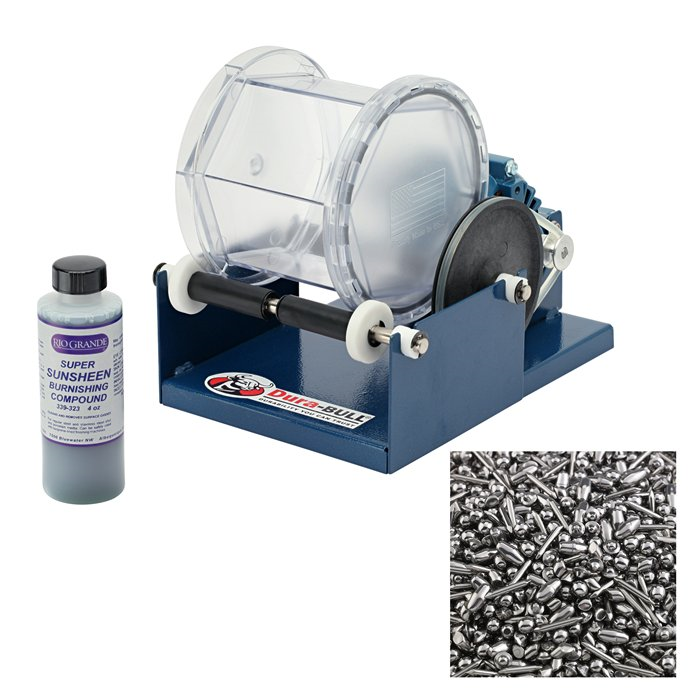
image from riogrande.com |
The next step in the process is somewhat controversial.
I tumble polish my chains with stainless steel shot. There is a school of thought that says that you should never tumble a loop-in-loop chain because the chain will work harden. I've never found it to work harden the chain enough to matter and nothing beats the tumbler for putting a nice shine on silver (fine or sterling). Tumblers and shot are available from most jewelry supply houses (e.g. Otto Frei and Rio Grande) |

|
A two hour ride in the tumbler with stainless steel shot, water, and a bit of dish soap as a lubricant and the chains come out looking great.
|
|
|
The final step is to assemble everything.
I hung the the pendant on a jump ring with an ID large enough to go around the chain with a little space left for the top ring on the pendant. I threaded the chain through it and added the clasp and the ring opposite the clasp. |
|
|
