|
My ca. 1900 Rosback pin perforator is one of the most precious pieces of equipment in my shop. Without one, you can't make really convincing fauxstage stamps. And since I've wanted to make my own stamps since I was a kid collecting the real thing, I was very happy to find one in 2020. Amazingly enough, Rosback is still in business making printing and bindery equipment. As part of a relocation, they had to downsize their collection of vintage equipment and this perforator (and, crucially, an envelope of spare pins) came my way. |

|
|
Rosback designed their perforator to allow partial rows of perforations on the sheet. For some reason, I started calling these "stopped perfs". Maybe because the rows stop before they get to at least one edge of the sheet? As supplied, though, there is very little adjustment possible for the length and position of the rows. The steel bars which hold the perforating pins down are very long and there are only a few of them. To achieve finer control over the row length, smaller increments of "activator bars" (again a term I just made up because I had to call them something) are required. The bars are simple steel rectangles with a cross section of 3/16" x 1/2". Time to fire up the Bridgeport milling machine and make some chips. |
|
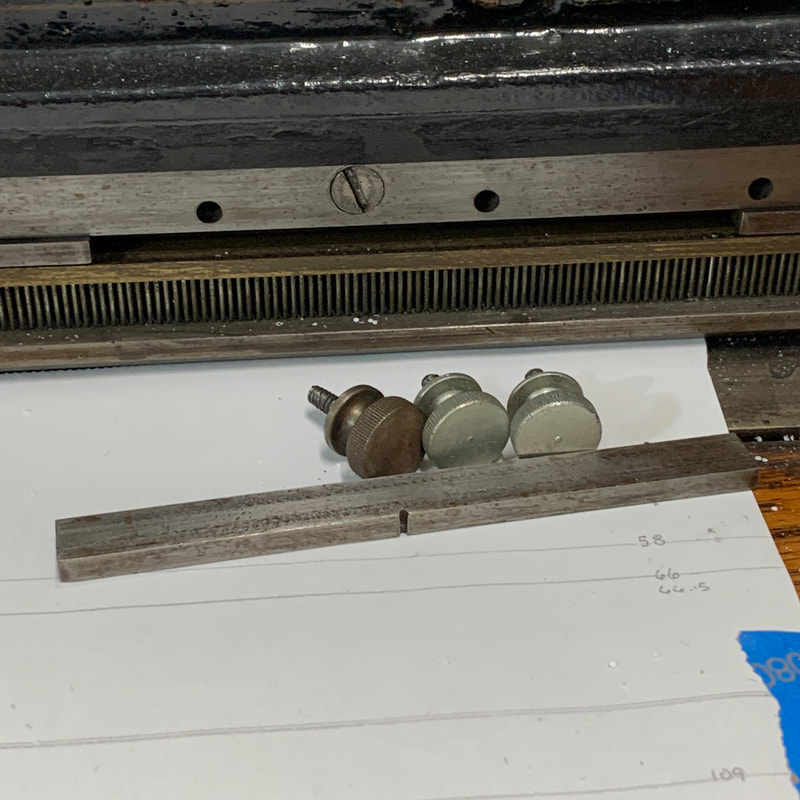
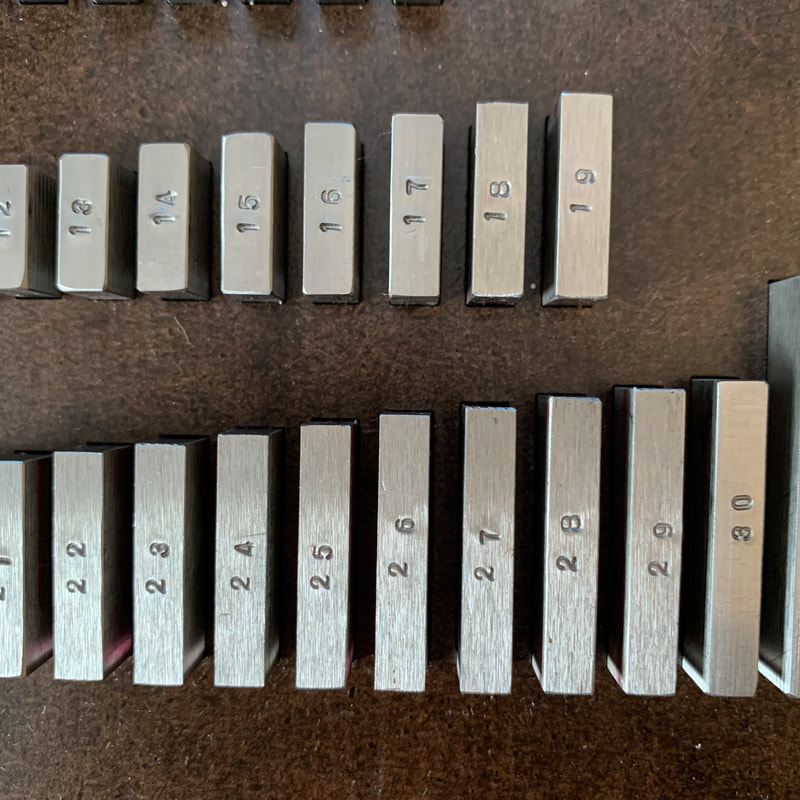
Set of Activator Bars 3/16" x 1/2" precision ground flat tool steel Stamped with the bar length in mm Custom-fitted tempered Masonite holder This set of bars is overkill but since I was making them I just kept going until I ran out of raw material. Most sizes below about 19 mm are unlikely to ever be necessary. With this set, a row of perforations of any length between 5 mm and longer than the typical 11" (279 mm) long letter size sheet can be made in 1 mm increments. This effectively allows control down to the individual pin. Since pins can be turned on and off across the entire length of the sheet, the bars also allow easy positioning of the perforations on the sheet without adjustment of the right angle fence on the perforator table. The bars are simply slide down the row of pins until the ones activated are in the desired location. This feature can be seen in the photo at the top of the page, which shows the bars installed in the perforator and the sheet perforated using them. The idea behind this set of bars is similar to the use of gauge block sets by machinists to create a reference object of a specific dimension in 0.001" increments. |

|
|
Figuring out what combination of bars to use is a matter of simple addition and subtraction. As an example, say you need a row of perforations 193 mm long. First, find the bar in the 20-30 mm range with the same "ones" digit as the length you need. Here, we would choose 23 mm. Next, subtract the 23 mm we chose from our total length and we can see that we need another 170 mm of bars. 170 mm is easily done with 100 mm and 70 mm. So all we need is 23mm + 100 mm + 70 mm = 193 mm. I always choose the fewest and longest bars because they are easiest to handle. |
|
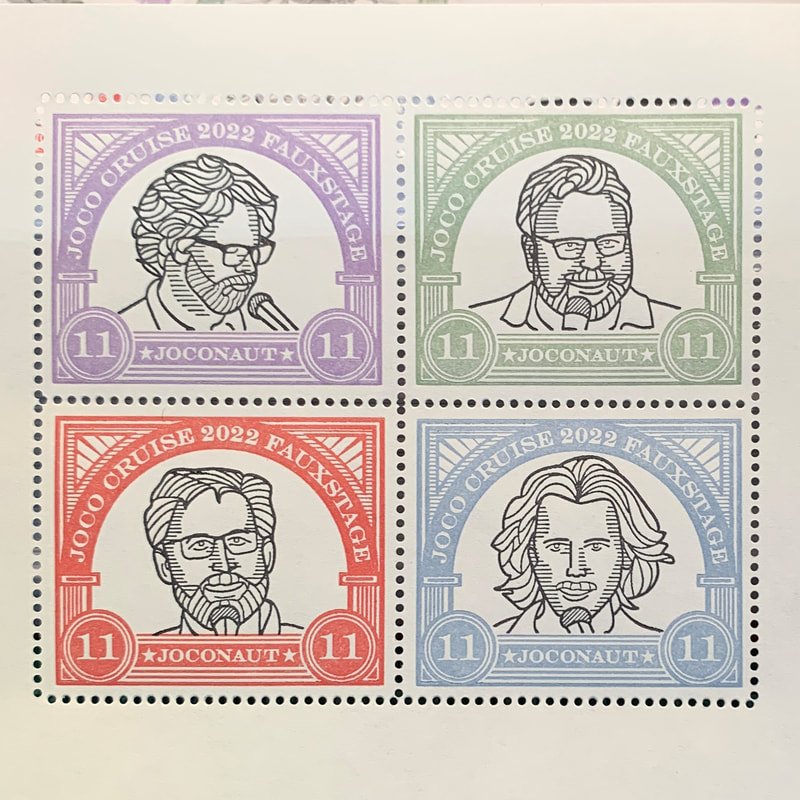
This sheet of stamps, created for JoCo Cruise 2022, illustrates the use of the bars to create rows of perforations of specific dimensions. These stopped perforations look really clean and professional, which is great. But, it's much hard to separate stamps like these from the sheet compared to stamps with rows of perforations that cross the entire sheet. At least they are easier to separate than stamps that are free-form perforated with the laser! |
|
